How to Implement MVVM Architecture in your React Native Application?
The interface is simple when you search on Google, but the underlying algorithms are complex. For a single command, the application will crawl through several data pages and identify the most suited before displaying them on the page. When you compare this website, logically, with Instagram, you will notice that the underlying code is entirely different.
When designing a website, you plan how the interface can communicate with the database to build the logic flow. Essentially, it is how you can ensure that the view reaches the model to access the data.
Every application has a model (backend or logic) and a view (the frontend or UI). What makes every application different is the architecture that helps the two communicate.
MVVM is one such architecture that binds the two ends of an application. This guide will take you through the following:
- What is MVVM
- MVC or MVVM
- How to use React Native with MVVM
What is MVVM?
The logic behind the screen and the driving force for displaying the components differ when you see a screen. For example, how you should display these components will use a different code than the logic specifying why and how these components will be helpful.
MVVM separates the layer that defines the code for UI from the code for the logic. It will ensure that the logic is separate and not part of the interface components.
The purpose of MVVM
- With MVVM, developers don’t need to render components. Instead, you create a business logic that helps you deliver the appropriate output.
- When you separate UI from the logic, you ensure that the interface displays the data while the interactions are presented by the view model, which results in simple and effective code.
MVC or MVVM: What is the Difference?
As discussed earlier, the model and view remain the same; what changes are how these two are connected. There are two majorly used architectural forms- MVC and MVVM. We will try to understand the fundamental difference between the two and what happens in each format.
MVC - Model-View-Controller
This is the standard pattern that most applications use to separate the model from the view. In this format, the controller identifies the data that matches the model.
With this pattern, the frontend and backend work as separate components, and the controller will be responsible for fetching the data, rendering the requests, and ensuring smooth communication.
The view receives the fetch requests from the controller and displays the data accordingly.
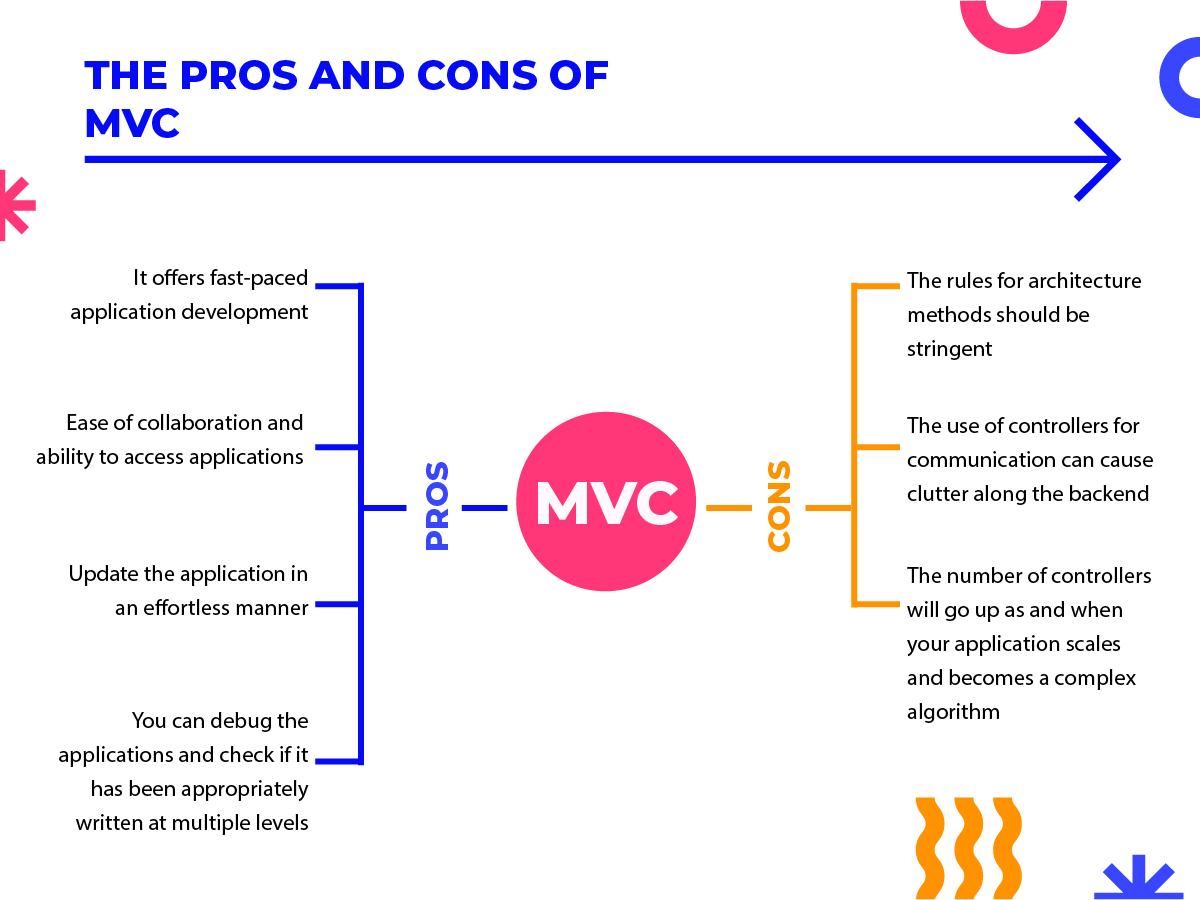
Like with every pattern, MVC has its set of pros and cons

Pros for MVC
- It offers fast-paced application development
- Ease of collaboration and ability to access applications
- Update the application in an effortless manner
- You can debug the applications and check if it has been appropriately written at multiple levels
Cons for MVC
- The rules for architecture methods should be stringent
- The use of controllers for communication can cause clutter along the backend
- The number of controllers will go up as and when your application scales and becomes a complex algorithm
Most developers still prefer MVC due to its ease of usage and accessibility.
MVVM- Model-View-ViewModel
This architecture pattern has recently gained popularity for being a more accessible and effortless way of allowing communication between the model and view. The ViewModel here tends to manipulate and render the data.
This is most often used to build single-page applications where the controller method may not work successfully.
To understand the ViewModel, you need to realize that it is dependent on the interface. It will access the data as required by the interface. It doesn’t fetch the data; if anything, it acts as a binder for the model and view.
In this model, the separation of concerns in the MVC is ignored; it is created in a way that allows accessible flowing communication between model and view.

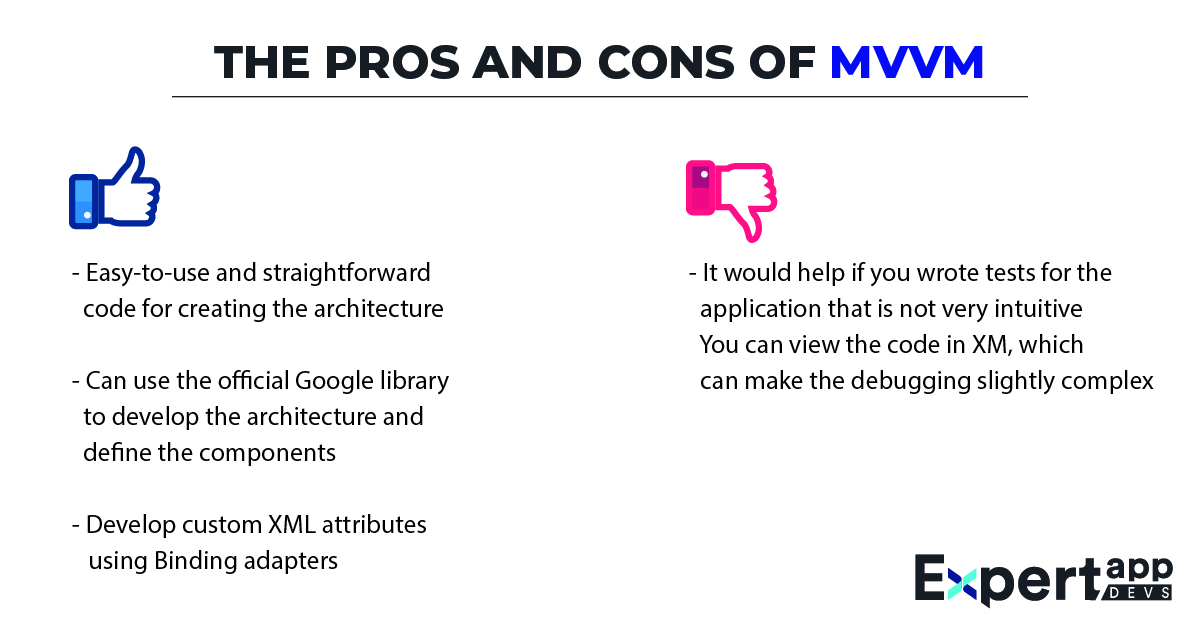
Pros for MVVM
- Easy-to-use and straightforward code for creating the architecture
- Can use the official Google library to develop the architecture and define the components
- Develop custom XML attributes using Binding adapters
Cons for MVVM
- It would help if you wrote tests for the application that is not very intuitive
- You can view the code in XM, which can make the debugging slightly complex
How to Use MVVM with React Native?
When you are developing a complex project with React Native, you may not be able to maintain the code and structure with ease. MVVM architecture makes the code manageable and ensures that it is scalable. You won't need to make any additions to the architecture while adding more views or models to the project Redux and MobX. Before choosing the apt method, you will need to develop a few apps.
Before we begin coding, we will take a look at MVVM in-depth. We just touched upon how it is valid and the pros and cons. Here we will look at the individual aspects and learn how to code each one for React Native applications.
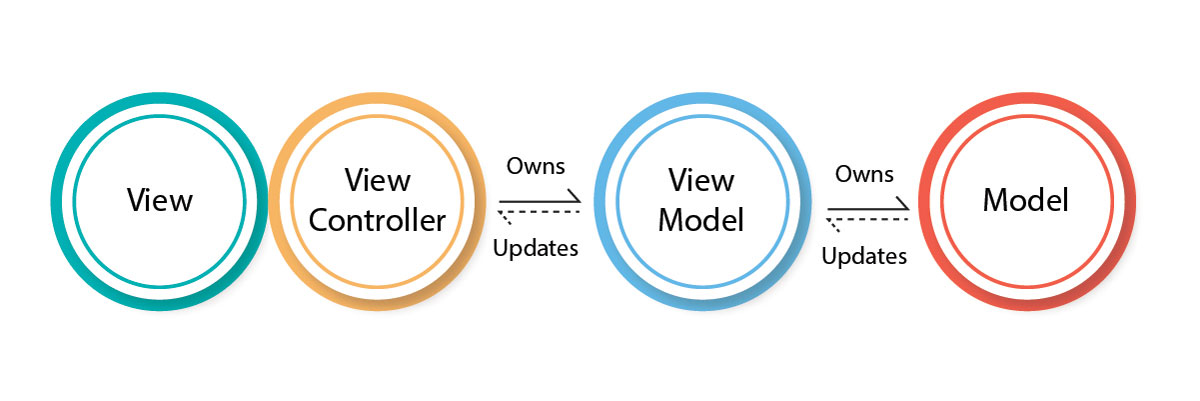
The four main blocks for any MVVM include:
- View
- ViewController
- ViewModel
- Model
Let’s understand each block in detail.

View
The view is your Interface, which you build with React Native framework. This is the point where the user will interact with your application.
Either they will input a command, use mouse movements or press a key to trigger the ViewController from the interface.
The interface doesn’t do much except take in and give out the display data. For instance, if you use the tax calculator, your input will be salary and other details, while the output will be the tax liability.
The view will only display the numbers and trigger events based on the input in both cases.
We will use MobX as part of this example to understand how you can create reusable components and code the view.
import React from 'react'
import PokemonList from './UI/PokemonList'
import PokemonForm from './UI/PokemonForm'
class PokemonView extends React.Component {
render() {
const {
pokemons,
pokemonImage,
pokemonName,
randomizePokemon,
setPokemonName,
addPokemon,
removePokemon,
shouldDisableSubmit
} = this.props
return (
<React.Fragment>
<PokemonForm
image={pokemonImage}
onInputChange={setPokemonName}
inputValue={pokemonName}
randomize={randomizePokemon}
onSubmit={addPokemon}
shouldDisableSubmit={shouldDisableSubmit}
/>
<PokemonList
removePokemon={removePokemon}
pokemons={pokemons}
/>
</React.Fragment>
)
}
}
export default PokemonView
Note: To use decorators in your application, you need to use the Babel plugin.
ViewController
This is where the command goes instinctively. Imagine this application as a slice of how things occur in your body. So, when you move your fingers to your mouth, you signal the brain to open the mouth to eat the food. Similarly, as soon as an input occurs on the view, the ViewController takes the function of the brain.
The ViewController will take up the command and pass it on to the ViewModel.
It is important to note that one ViewController can pass commands to several ViewModels. You won't need to ramp up the controllers in this case. The command will be cleaned, interpreted, and passed to the ViewModel, thus enabling easy access.
import React from 'react'
import PokemonView from './PokemonView'
class PokemonController extends React.Component {
state = {
pokemonImage: '1.gif',
pokemonName: ''
}
setRandomPokemonImage = () => {
const rand = Math.ceil(Math.random() * 10)
this.setState({ pokemonImage: `${rand}.gif` })
}
setPokemonName = (e) => {
this.setState({ pokemonName: e.target.value })
}
clearPokemonName() {
this.setState({ pokemonName: '' })
}
savePokemon = () => {
this.props.viewModel.addPokemon({
image: this.state.pokemonImage,
name: this.state.pokemonName
})
}
addPokemon = () => {
this.savePokemon()
this.clearPokemonName()
}
removePokemon = (pokemon) => {
this.props.viewModel.removePokemon(pokemon)
}
render() {
const { viewModel } = this.props
return (
<PokemonView
pokemons={viewModel.getPokemons()}
pokemonImage={this.state.pokemonImage}
randomizePokemon={this.setRandomPokemonImage}
setPokemonName={this.setPokemonName}
addPokemon={this.addPokemon}
removePokemon={this.removePokemon}
pokemonName={this.state.pokemonName}
shouldDisableSubmit={!this.state.pokemonName}
/>
)
}
}
export default PokemonController
ViewModel
This is the third and most important block of the MVVM architecture. At this point, the block is not communicating with the interface directly. So, it will not know whether the interface was built using React, Vue, or any other framework. It is a JS class that you can reuse to make any application.
At this point, the class uses dependencies through the constructor. This will make it feasible to test the app and help you improve the app or enhance the features.
class PokemonViewModel {
constructor(pokemonStore) {
this.store = pokemonStore
}
getPokemons() {
return this.store.getPokemons()
}
addPokemon(pokemon) {
this.store.addPokemon(pokemon)
}
removePokemon(pokemon) {
this.store.removePokemon(pokemon)
}
}
export default PokemonViewModel
Model
This is your source for accessing the data; from here, the ViewModel and ViewController will gain the necessary output and send it to View.
This part of the architecture will find databases, network layers, and services. Your logic should be restricted to helping the model send the necessary updates to the View.
This is your MVVM architecture. However, there is an extra component that you will use to bind these elements together, and it is known as a provider. The provider is not part of the MVVM architecture but will be used when creating the app solution.
Provider
When working with ViewModel, you will need to inject dependencies that can help quickly collect the data and send it to the View. That’s where the provider will help. The instances in the ViewModel are passed to the ViewController through this block after injecting the necessary dependencies.
This block doesn’t carry any logic. It is designed to connect the different blocks properly.
import React from 'react'
import { inject } from 'mobx-react'
import PokemonController from './PokemonController'
import PokemonViewModel from './PokemonViewModel'
import RootStore from '../../models/RootStore'
@inject(RootStore.type.POKEMON_MODEL)
class PokemonProvider extends React.Component {
constructor(props) {
super(props)
const pokemonModel = props[RootStore.type.POKEMON_MODEL]
this.viewModel = new PokemonViewModel(pokemonModel)
}
render() {
return (
<PokemonController viewModel={this.viewModel}/>
)
}
}
export default PokemonProvider
Conclusion
Adding MVVM architecture to your React Native app can help you boost communication, reuse components, and enhance performance. This ensures that the view and model are in sync. You won't need to keep adding controllers to scale your app, thus making growth and scalability flexible.
If you don't have the in-house expertise to develop a React Native app for your business requirements, you can consider outsourcing. Our experts have identified and incorporated several solutions using the MVVM architecture.
Connect with our team for a lengthy discussion and a rewarding app solution.
 Jignen Pandya


