Advanced Flutter Development Techniques for Marketplace Apps
If you have been planning advanced concepts Marketplace app development with Flutter, you must incorporate the development best practices. Our Flutter developers at Expert App Devs believe a UI is experiential when you meet the user's goals.
Catering to their interaction needs, matching their usage points and ensuring accessibility are three must-include development pointers. We have been developing interactive and intuitive marketplace UIs for several businesses.
Considering the increasing usage of marketplace applications, more businesses are approaching technology companies to deliver solutions. 89% of the users said they were more likely to purchase from Amazon than other eCommerce websites.
Marketplace sales are estimated to reach $468.29 in 2024 in the US (emarketer).

These numbers indicate it is a good time to invest in a marketplace application.
Our team has curated specific marketplace app development tips and best practices with Flutter during this period.
It has helped us approach our newer projects with a better understanding and accelerate development. We hope to help Flutter app development teams and Marketplace businesses by sharing these tips. It will impact your development criteria, help you choose appropriate goals and team with expert developers/designers.
So, let's start with the tips and techniques you must incorporate to deliver a successful marketplace mobile app with Flutter.
Advanced Flutter Tips You Must Know to Enhance Development
Your advanced Flutter developer may have faced a lot of flak for delays or issues after release. There are several things, if they consider in advance, that can improve the developer's workflow. It will allow them to launch an error-free and happy marketplace application.
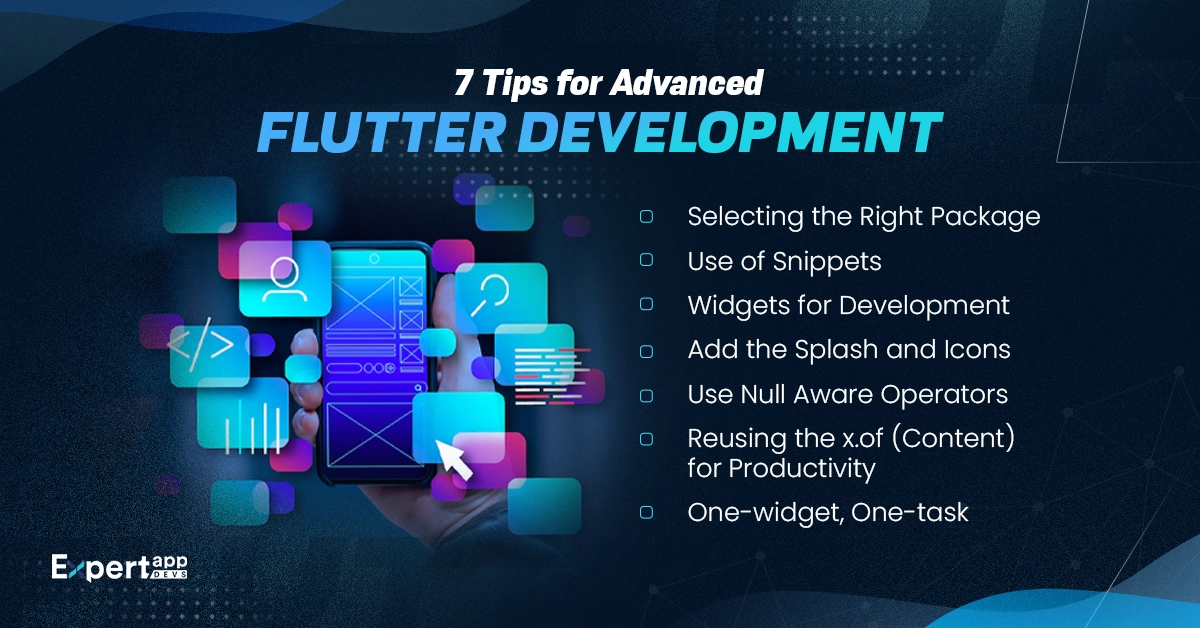
#1 Selecting the Right Package
Most often, Flutter developers tend to incorporate an already available package. Their first job is to get the app out and ensure it reaches the users.
However, when the users begin sharing feedback, developers will find things unavailable in the packages. They would realize the existing package is insufficient for development.
Instead of waiting until after launch and user feedback, you can determine the apt package before development. You must use your project understanding, development knowledge and usability criteria to develop a package.
It is equally important to check if the package comprises the flutter app development tools. This will ensure you get the support or development infrastructure you need. Checking the author's details can help you ensure a proper app development package.
#2 Use of Snippets
As a developer, you must perform certain tasks continuously. You would be repeating these tasks a number of times. Imagine how that would hamper your productivity. It would also delay the marketplace app development.
Moreover, the marketplace app development would need the same states defined in different places. You can create custom snippets for stateful widgets and save time. It would accelerate your development time and ensure that the components within a marketplace app are working.
#3 Widgets for Development
We cannot emphasize enough on this aspect, as it is core to Flutter app development. Ensuring widget developments for Flutter UI will save time and enhance the application's usability.
There are several forms of widgets that you can use to create the application.
- Tooling: The Extract Widget is one of the best ways to simplify development. Several shortcut widgets can help accelerate development. Tooling is a set of all the shortcuts that can enable you towards better development.
- Private Widgets: The other method that can help deliver an app before anyone else would be private widgets. It will ensure that the piece of code is clean and clutter-free. You can organize the entire code so the developer can move around easily. You need to create a big strong widget and add a lot of nesting for better movement.
#4 Add the Splash and Icons
There are two packages that you would need when developing Flutter. If you aren't sure about them, then take our advice and add it. The Flutter Launcher Icons and Flutter Native Splash will reduce your development time massively. It comes with exceptional documentation that saves you time in developing the solution.
#5 Use Null Aware Operators
As a developer, your goal is to develop clutter-free and clean code. You must use null-aware operators such as ??, ??= and others. This will give the requisite spacing and help you stabilize the Flutter code.
#6 Reusing the x.of(Content) for Productivity
You might need to use a single content multiple times in the UI. For instance, if a particular text will repeat across the pages, creating a different x.of (content) can make code complicated. Instead, create a single code and reuse it wherever needed. It would accelerate coding and maintain clean codes through the application.
#7 One-widget, One-task
You may be tempted to create a single widget and add multiple tasks. It seems super easy and productive. However, when you begin working around that widget, you realize it is a mammoth task to get it working. Moreover, debugging it would be equally tough.
As a result, you might want to create a single-task widget. This would ensure that a single widget attends to each task.
We will look at some tips and techniques that we believe will impact marketplace development. These are individual instances. However, they can carve an interesting outcome for businesses when they are put together.
Read more: UI/UX Design Principles for Flutter
How to Approach State Management in Flutter?
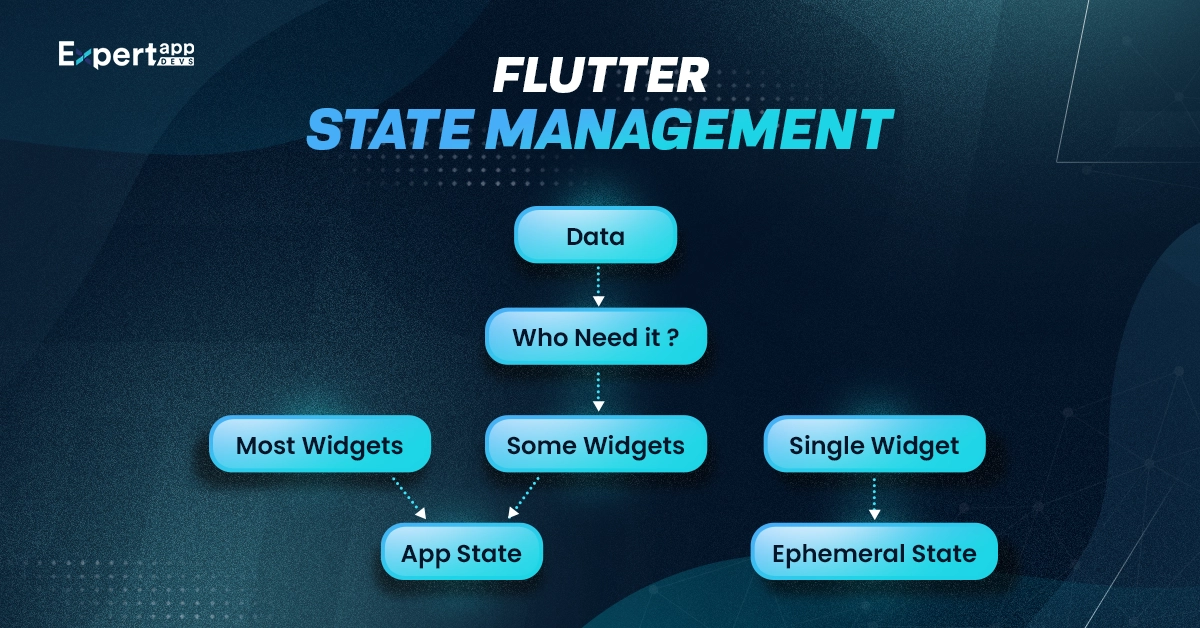
The state is the data you must use to create the Flutter UI. This is an integral part of the application.
In Flutter, the framework will rebuild the UI whenever the application's state changes. The state can be categorized as below:
- Ephemeral State: It is described as the widget or animation's current state. It can be easily accessed and doesn't cause complications.
- App State: The app state is everything from when the user first logs into the application. For instance, if they have set some preferences, they would be logged into the app state. Similarly, if they have added some information, it would be app state.
The State Management Provider
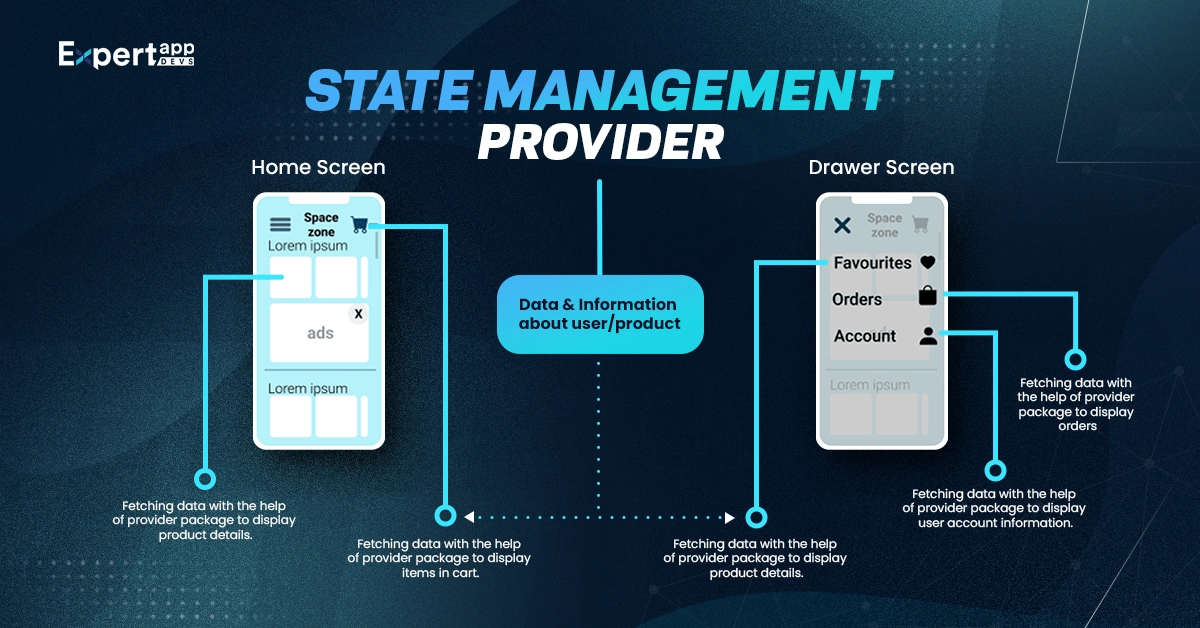
When you combine the state management and the dependency injection, you get the state management provider. The provider will ensure that a change in the state does not impact the entire widget tree.
It will reduce the complexity involved in state management. Instead, it would just ensure that the particular widget that's impacted changes. It is important to note that are several stateless widgets as well.
Here are some popular providers you can use for state management.
- Flutter Management: InheritedWidget is a state management provider. You can use it as a widget that will move the changes from downstream to the top of the tree. Your parent state would be notified of the changes made to the widget. However, this approach may not be useful for large-scale applications.
- Redux: You can separate the logic and business layers to create a single directional flow of components. With this state management approach, you can build smooth interfaces and identify bugs. It is one of the best ways to design large-scale applications. You can use the boilerplate code to create the basic application.
- setState: This is the third most used state management provider. It is effective for the states that are locally defined. You can use it to manage the current state of the application.
The State Management Principles
A set of principles governs the changes made to the states in the UI. We will discuss them in detail here.
- Riverpod: You can use this principle to determine the issues in the provider. You can improve the unidirectional data flow and testing aspects with the principle. You can use the approach to control the state and redefine them directly.
- GetIt: This principle will help you connect the objects. You can control the state and separate the interface and concrete implementations.
- Bloc: This provider library assists them with testing and development aspects. You can build the states for Flutter easily with this library.
How to Integrate APIs in Flutter?
APIs are protocols that can help integrate your current business software with a third-party application or software solution. You can use the RESTful Web Services to incorporate the REST architecture when using the REST APIs.
Here are the steps to help integrate your REST API into the Flutter application.
- Your first step is to incorporate the API key. You will need the base API or endpoints to manage the key.
- You will need in-app packages that can help implement the API resources. This will include HTTP, Dio and Chopper into the application.
- You will now need a constant file containing the URL and Endpoints.
- Next, try parsing the JSON file so that you can get the object while getting the JSON response.
- You will now need to define the methods that can be used to handle API calls. You will need to define the methods for parsing or fetching the data.
- Lastly, you must call the method to load data into the UI.
How to Integrate In-app Payments for Better Transactions
In-app payments are important for marketplace applications. It will help the customers connect with the business, purchase the product and complete the payment. As a Flutter developer, you should be able to determine the best practices to integrate the payments and ensure better transactions.
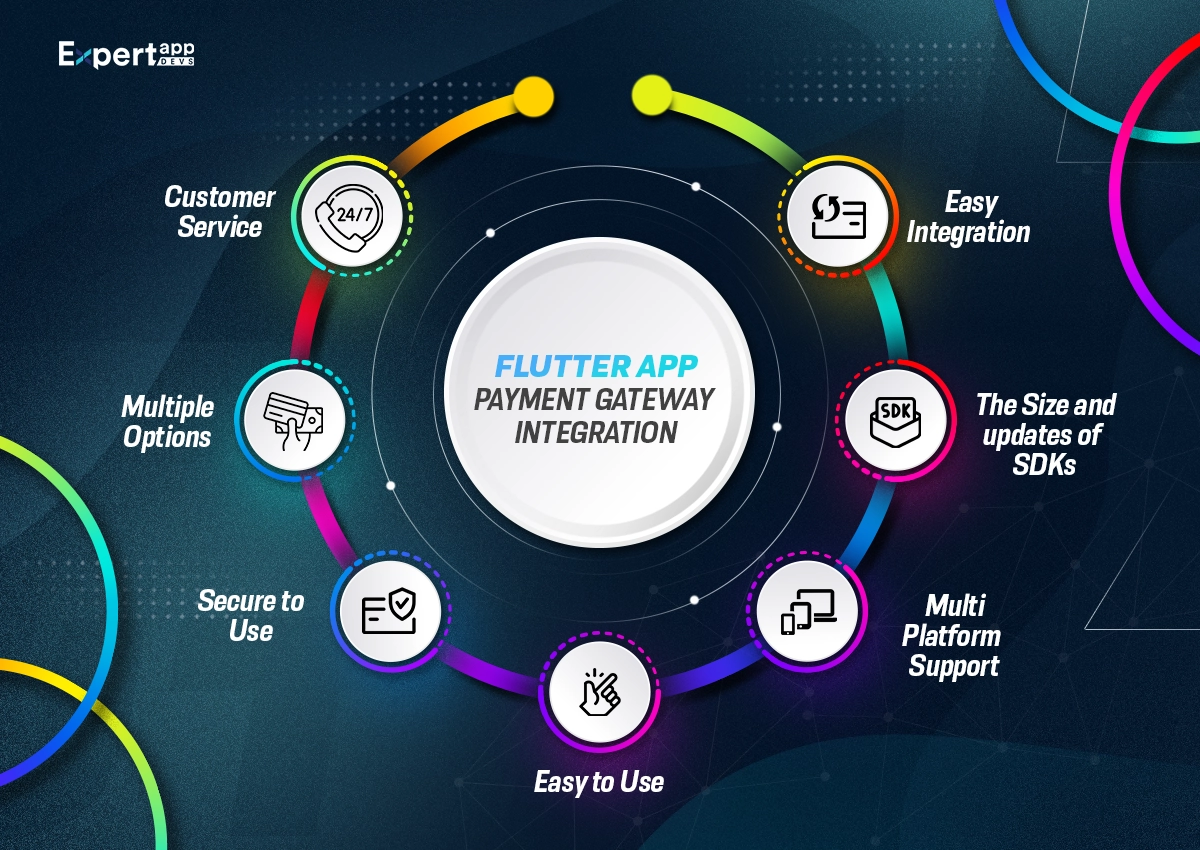
For the sake of this article, we will discuss the integration with RazorPay.
- Start by creating a new project for the payment gateway integration in Android Studio. You can check the detailed documentation for creating the project.
- You need to add the Razorpay file to the path pubspec.yaml file, which is your new project.
- While adding the file, ensure you install the entire package. Select the version with advanced features that works best for your project.
- To integrate the payment gateway, you need the API key. For this, you need to find the API_key and API_secret. Once you have installed the package, generate the new key for the API. At this point, you need the key ID to test the Razor Pay integration.
- Next, you must create an instance to test the outcome with Razorpay integration.
- You must create a wide range of event listeners to handle the various functions. Once that is done, you must attach the functions associated with the event listener.
Lastly, you must create an order in Razorpay with the order ID and other details. Next, create the order in the Flutter application to check the integration.
- Once done, click on the checkout page and check if the payment method is available via Razorpay.
- For the best outcomes, you might want to store the razorpay_payment_id and razorpay_order_id fields in the integration.
- Make sure to check the signature and verify other important details post-integration.
Role-based Access and Other Techniques
When creating a marketplace application, you must incorporate role-based access. This will allow certain specific tasks for the key decision-makers. It will offer greater security within the business.
You should also ensure you integrate ratings and reviews, which can help the business expand. In this section, we will take you through the pointers that can help you integrate the same.
- The first step to setting up authentication in your Flutter app would be creating the initial application.
- You must use the Flutter SDK v2.0, XCode 11, Ruby 2.6.0 and CocoaPods 1.10 for this case.
- You can use any flutter IDE, such as IntelliJ or Android Studio.
- You must have all the relevant Flutter and Dart codes to get started.
- Next, configure the project and start running it. you must have the required repository to get started.
- Once you are sure your app is running and is free of errors, you can move further from here.
- You should first go to the place where you are likely to set up the support for the app. Here, you must click the Profile button to display the user information.
- Implement the login for the Flutter application. You need to create the following to implement login functions.
- HTTP: this would be a library of all the HTTP requests that your Dart team will incorporate.
- Flutter_appauth: this is the wrapper package that is prevalent around AppAuth. It helps with authentications and authorizations.
- Fluttersecurestorage is where your Flutter data will be stored securely.
- When implementing role-based access, you must also configure the callback URL. This will allow the Auth0 to communicate back to the application.
- You must configure the callback URL for both iOS and Android. As it is open source project, this might happen easily for you.
- Make sure you have added the configurations that will help the Flutter app seek registrations from the user.
- You will need to set the client ID, secret and domain for the entire authentication to process.
- Last, you must follow the steps mentioned in the documentation to integrate Auth0. This will help integrate role-based access in Flutter application development.
Lesser Know Flutter Development Techniques
Let's look at some of the lesser-known but highly useful Flutter tips and tricks you must use.
1. Implementing the Platform-specific Native Code
We all know that Flutter is based on the Dart programming language. However, most operating systems may not support Dart. It is important to convert them into the native language for ease of usage and better performance.
The Flutter engine module is the answer to this. You can house your Dart-based applications on the engine and ensure complete native support.
You can even modify the host app sources using this engine. You can also use the platform API to create apps in specific programming languages.
For instance, you can use the API to build an app using Java or Kotlin. This will help as it already have the in-built Java library.
2. Embedding Python Modules
You can embed both Go and Python modules for ease of development within the Flutter application. This allows you to ensure the Go modules are present in the Android and iOS applications. If you have used Python to build some specifics of the application, embedding it will be available in all native applications.
This will also enhance the backend, as Go contains all the backend modules needed to build a robust application.
Conclusion
Flutter offers wholesome marketplace web and mobile applications development with its distinctive features and the stability induced by Dart. You can integrate all the key elements within the Flutter app seamlessly using the steps mentioned here.
By following and learning Flutter tips, tricks and techniques, you can accelerate application development. It can also ensure stable and robust application development.
Expert App Devs is a leading Flutter development company in India and US with proficiency in marketplace app development. We have created numerous applications and fostered growth in this segment. If you have a marketplace app idea, connect with our team.
Read More:
- 8 Optimization Tips to Improve Your Flutter App Performance
- The Ultimate Flutter Project Migration Manual
 Jignen Pandya
