React Native App - Testing, Deployment and Maintenance
In the cross-platform app development arena, React Native has been one of the most preferred gladiators. Owned by Facebook, React Native offers a wide array of benefits to developers and businesses.
React Native makes the whole cross-platform app development process simple, straightforward, and linear.
Facebook launched React Native in 2013 and made it public in 2015. Since then, it has given a paradigm shift to the way mobile apps are developed.
Some of the most popular mobile apps are developed with React Native, like Facebook, Instagram, Pinterest, Uber Eats, Tesla, Walmart, etc.
As per the Stack Overflow Survey 2023, 8.43% of developers prefer React Native over other frameworks. Not just that, 11.81% of developers desired to work with React Native in the future.
However, we would love to discuss three main aspects of React Native app development: React Native testing, deployment, and maintenance.
Before we start discussing, let’s discuss in brief what React Native is and its advantages.
What is React Native?
React Native is a Facebook-owned, JavaScript-based, open-source framework. It helps developers to build cross-platform applications for Android and iOS platforms.
Developers can write code once and use the same codebase to build an app for the other platform. For example, if you have written the code for an Android device, you can use the same codebase to develop an app for iOS.
React Native is based on the famous React library, also owned by Facebook. React Native offers developers a wide array of powerful features to build high-performance, feature-rich, native-like mobile apps that brilliantly serve business goals.
The best thing about React Native is that developers don’t have to write separate code for each platform. It saves time and costs by a significant margin.
Also, React Native allows you access to native APIs and components like mobile cameras, geolocation, contacts, etc., to build native-like apps. React Native also has an intuitive UI library and cross-platform support for popular libraries like Redux.
React Native makes the whole app development process simple for developers. You can have code implementation for complex features in OS-native languages. For example, it offers code implementation in Swift and Objective-C for iOS and Java and Kotlin for Android.
What Are The Benefits of React Native?
Now, let’s discuss the benefits of React Native in brief.
#1. Code Reusability
With React Native, you can develop two or more applications with a single codebase. It is the biggest advantage of React Native, especially for companies with tight budgets and time deadlines.
You don’t have to hire separate teams for iOS and Android apps. With React Native, you need to hire React Native developers for your cross-platform app development project.
#2. Hot Reloading
It is another useful feature of React Native. The Hot Reloading feature allows developers to see the changes in the code in real-time without any refreshing. It allows developers to get real-time feedback about changes they have made in the code.
It results in increased productivity and efficiency. Furthermore, you will need to reload only specific code parts, saving time by eliminating the need for full compilations.
#3. Performance
Performance is another advantage of React Native. React Native apps perform like a near-native user experience, thanks to its bridge concept. React Native apps don’t take longer to load; even complex features work excellently without any performance issues.
#4. Cost Efficiency
The main reason a business goes for cross-platform app development is the cost. The code reusability feature of React Native reduces the app development cost by a margin.
Unlike native app development, where you will need two separate teams for Android and iOS, you can have a small team to develop a React Native app.
#5. Community Support
React Native has a thriving community to support all React Native developers worldwide. Also, it has rich resources to back developers. The community is expanding rapidly, with developers contributing to it.
Also, as Facebook owns it, they develop various improvements and elements to widen the network. You will have a helping hand when you are facing any troubles.
#6. Constantly Evolving
Even though React Native is a relatively new network, it is gaining popularity across the globe because it is the most evolving framework. Facebook regularly develops improvements and new features, helping developers build highly powerful and rich mobile applications.
React Native App Testing
You cannot deploy an app without thoroughly testing it under different scenarios. All the features and functionalities of the app must be checked before releasing the app with React Native.
Regarding React Native, developers conduct testing and quality assurance in various manners. We will discuss them in brief to give you some ideas.
✓ Unit Testing
Developers do Unit Testing Unit testing to test individual components or React Native code units in isolation. Mostly, in the React Native app testing process, developers use testing libraries like Jest, Enzyme, or React Testing Library.
The main aim of unit testing is to ensure that each React component behaves as expected. Also, it determines whether specific functions work perfectly and accurately or not.
✓ Integration Testing
Integration testing is another app testing methodology to ensure that all the interactions and integrations between various React Native components or modules function together as expected. It is a holistic way of determining the system's behavior.
Developers check and verify the interactions between different modules and components within the app to ensure that the integrated parts of the app are working fine. Detox is the most preferred integration testing framework developers use for this purpose.
✓ Snapshot Testing
Snapshot Testing is one of the crucial testing methodologies for React Native and other JavaScript-based development frameworks. The main aim of the snapshot testing is to ensure the consistency of UI components during different renders over time.
Developers take a snapshot of the UI component and consider it as a reference point. Now, after some time, another test is performed and the result is compared with the previous snapshot.
The reference point is the actual way the user interface should behave. If there are any differences between these two snapshots, it simply means that the testing has failed as the UI has changed drastically.
Let’s discuss the process of Snapshot Testing
#1. Testing Environment Setup
First of all, developers need to set up a testing library like Jist. The library allows you to set up a testing environment for your app code. You can also use various testing utilities like react-test-renderer.
#2. Render Component
For the above-mentioned testing utility, you need to write a test case that renders the component you want to test.
Now, this utility will use the Virtual DOM to render the component and offer you various methods to interact with and inspect the rendered output. During this rendering process, a snapshot will be taken and saved in a designated file.
#3. Subsequent Test Runs
For each subsequent run, a snapshot of the newly rendered output will be saved and then compared with the reference point. If they don’t match, the test is considered a failed one. If they match, the test is a success.
#4. Updating Snapshots
Now, this is crucial. If you have made some changes to the UI, you have to update the snapshot. You can do this with a flag like --updateSnapshot or -u. It will overwrite the previous snapshot with the new one.
✓ End-to-End Testing
Also called as E2E testing, the main purpose of carrying out this test is to check the workflow of the entire application. This is done mainly from a user’s perspective.
Developers will check whether the app and all the parts are working together perfectly or not. The UI, features, and functionalities are tested thoroughly to ensure that the app behaves and functions correctly. Developers can use the tools like Detox and Appium for E2E testing.
React Native App Deployment
Deploying the React Native app is also a huge task, especially for the Apple App Store. What do you need to keep in mind while deploying an app? This section discusses it in detail.
✓ React Native App Deployment for Android
First, your app must be digitally signed, including a certificate, before deployment. It must be signed with a release key that can be used for all future updates. In 2017, Google Play Store introduced a feature called App Signing that manages signing releases automatically.
Furthermore, your app must be signed with an upload key before you deploy your React Native app. You can read more about it on the “Signing Your Applications” page.
Let’s discuss the steps for React Native deployment.
#1. Generate an Upload Key
You can use a private signing tool known as Keytool to generate an upload key.
For Windows:
You will need to run the Windows keytool using C:\Program Files\Java\jdkx.x.x_x\bin.
Once you give this command, you will be prompted for the keystore and key passwords. Then, it will generate the keystore as a file called my-upload-key.keystore.
This key is valid for 10,000 days.
#2. Setting up Gradle Variables
To set up Gradle variables, you must place the above keystore in the Android/app directory in your project folder.
Now, you need to edit the file and add the following
MYAPP_UPLOAD_STORE_FILE=my-upload-key.keystore
MYAPP_UPLOAD_KEY_ALIAS=my-key-alias
MYAPP_UPLOAD_STORE_PASSWORD=*****
MYAPP_UPLOAD_KEY_PASSWORD=*****
You need to replace ***** with your keystore password, alias, and key password.
You can use these Gradle variables that can be used in Gradle configuration to sign the app.
#3. Adding Signing Config to Your App's Gradle Config
With the upload key, you need to set up release builds for signing. You need to use the following signing config.
...
android {
...
defaultConfig { ... }
signingConfigs {
release {
if (project.hasProperty('MYAPP_UPLOAD_STORE_FILE')) {
storeFile file(MYAPP_UPLOAD_STORE_FILE)
storePassword MYAPP_UPLOAD_STORE_PASSWORD
keyAlias MYAPP_UPLOAD_KEY_ALIAS
keyPassword MYAPP_UPLOAD_KEY_PASSWORD
}
}
}
buildTypes {
release {
...
signingConfig signingConfigs.release
}
}
}
...
#4. Generating the Release AAB
In the terminal, you need to run the following command:
npx react-native build-android --mode=release
This command will allow you to use Gradle’s bundleRelease to bundle all the JavaScript to run your app into the Android App Bundle. Now, the generated AAB can be found at android/app/build/outputs/bundle/release/app-release.aab to be uploaded to Google Play.
✓ React Native App Deployment for iOS
When it comes to deploying the iOS app on the Apple App Store, you will have different considerations to make. Let’s discuss this in detail.
#1. Enable App Transport Security
Apple launched the ATS (App Transport Security) feature in iOS 9. This feature rejects all the HTTP requests which are not sent over HTTPS. To make the development process simpler, this feature is blocked for localhost in React Native projects.
You need to remove the localhost entry before starting the app development production. You can do it from NSExceptionDomains and setting NSAllowsArbitraryLoads to false in your info.plist file.
#2. Configure Release Scheme
You will need the release scheme in Xcode to build an app for distribution. It will automatically disable the in-app Dev Menu. users will not be able to access this menu in production. Also, it will help developers to bundle the JavaScript locally for app testing without computers.
You need to follow this command:
Product → Scheme → Edit Scheme
Now select the Run tab in the slidebar and send the Build Configuration dropdown to Release.
One thing that you need to remember here is that when your app bundle starts growing, you will see a blank screen flash between your root app view and splash screen. You can use the following code to keep displaying your splash screen.
// Place this code after "[self.window makeKeyAndVisible]" and before "return YES;"
UIStoryboard *sb = [UIStoryboard storyboardWithName:@"LaunchScreen" bundle:nil];
UIViewController *vc = [sb instantiateInitialViewController];
rootView.loadingView = vc.view;
#3. Build an App for Release
Now, it is easy to build your app for release by tapping Cmd ⌘ + B or you can do it by selecting Product– Build from the menu bar. Once you have done it, you can distribute the app to beta testers and submit to the App Store.
Once the app is tested thoroughly, you can follow these guidelines.
- First of all, you need to launch your terminal and then go to the iOS folder and type OPEN.
- Now, double-click on your app name at YOUR_APP_NAME.xcworkspace to launch XCode.
- Now, click on Product → Archive. Set the device to “Any iOS Device (arm64).
- Once the archive is done, click on Distribute App.
- If you want to publish the app on App Store, click on App Store Connect.
- Click Upload and then hit Next.
- Based on your business needs, you need to select Automatically manage signing or Manually manage signing.
- Now, click on Upload.
- Under TestFlight, you can find the app in the App Store Connect.
Now, after filling up all the details, you can go to the Build Section to select the build of the app and then click on Save → Submit For Review.
React Native App Maintenance
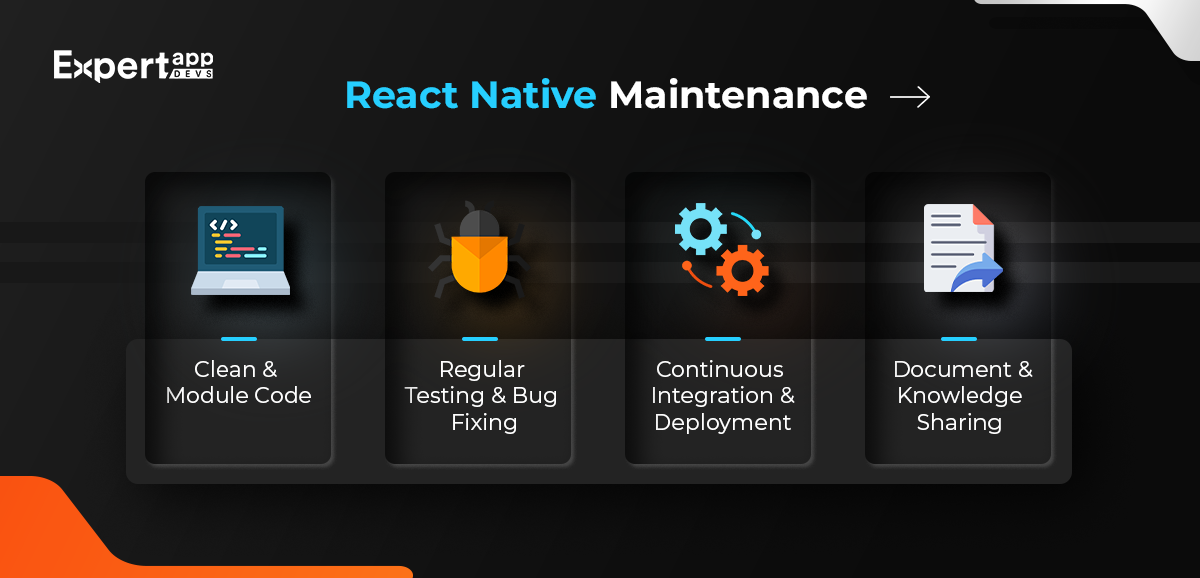
React Native maintenance is crucial for consistent user engagement. It will bring long-term success and user satisfaction to you.
Monitoring the app and ensuring the release of new versions from time to time is essential to keep users' interests intact. Also, developers need to maintain the app to fix the bugs and errors occasionally. In this way, you don’t have to invest much money in just a few weeks or months.
By maintaining your app regularly, you can get a large return on your investments. On the other hand, if you fail to maintain your application, you will have to face certain repercussions discussed below:
- Your app might face security breaches due to security vulnerabilities
- Your app might not function optimally.
- Frequent application downtime will be common
- You might suffer financial losses.
- You might face legal and regulatory compliance-related risks.
Here is a list of React Native maintenance tips to maintain your app and save costs.
✓ Clean and Module Code
It can be advantageous to have a clean module code during maintenance. Developers can read, understand, and modify the codebase easily. Not only that, but with clean code, developers will be able to collaborate brilliantly.
It will mitigate errors and risks during the maintenance process. Following a clean coding practice, you can reduce maintenance costs by a significant margin and maintain your app more efficiently.
You can follow clean coding practices:
- Keep code readability simple by using meaningful variable and function names.
- Break down complex code into smaller, reusable modules to keep them readable.
- Keep consistency by following coding conventions and indentation standards.
- Add comments to provide explanations.
- Refactor and remove redundant code to keep the code simple, clean, and maintainable.
✓ Regular Testing and Bug Fixing
Another way you can reduce maintenance costs is by testing and bug fixing regularly. It makes the app stable and reliable. Furthermore, when you identify and fix small bugs, you prevent them from escalating into bigger issues. Developers should understand that testing and bug fixing is an ongoing process.
Some tips are:
- Use automated testing frameworks to detect issues and bugs.
- Develop a bug-tracking system to identify and prioritize reported issues.
- Go for regular code reviews with the development teams to identify potential errors and bugs.
- Ask users to offer feedback about the app and its functionalities.
- Keep a proactive approach to address bugs by assigning resources and keeping realistic timelines.
✓ Continuous Integration and Deployment in React Native
Keep a habit of continuous integration and deployment to simplify maintenance. You can have a streamlined workflow by automating the build, testing, and deployment processes.
It allows developers to identify and fix bugs quickly and update the app accordingly. Here is a list of tips:
- Use various CI/CD tools like Jenkins, Travis CI, or CircleCI.
- Implement different automated testing frameworks like Jest or Enzyme.
- Use containerization techniques for effective workflows and consistent app builds.
- Go for version control systems to manage code changes.
✓ Document and Knowledge Sharing
When you have sophisticated documentation, app development, and maintenance become easy. The main aim behind documentation is to offer reference points to developers about the app architecture, features, and code structure.
With proper documentation, developers can easily resolve issues and errors. Also, the collaboration between different teams becomes easier with it. Here is a list of tips to follow for proper documentation and knowledge sharing:
- Assign the documentation task to developers and ask them to document even minor details, including setup instructions, code structure, explanations, etc.
- Document code changes and updates as well.
- Develop a knowledge-sharing platform for collaboration.
- Conduct regular code reviews among the teams for cross-training purposes.
- Encourage developers to open communication to share their knowledge and concerns.
Conclusion
React Native is one of the most preferred cross-platform development frameworks. React Native apps offer near-native performance and load fast. It saves developers’ time and cost as well.
We have discussed React Native testing, deployment, and maintenance in this blog to give you a glimpse of how these parts work while building React Native apps.
We are hopeful that this blog will be useful if you are looking for information relevant to React Native testing, deployment, and mobile app maintenance.
 Jignen Pandya
