React Native App Development: From Idea to Success
Mobile apps have become an integral part of our lives. Millions of apps are available on the Google Play Store and Apple App Store for various purposes.
Whether you want to play a game, shop online, communicate with your loved ones, or check your financial portfolio, there is an app for you. A business mobile app can open a door for various opportunities and possibilities. Let's check out some statistics about mobile apps.

This is the best time to launch your mobile app. You can go either for native or cross-platform app development. Mostly, startups prefer cross-platform app development because of budget constraints. Also, cross-platform apps take less time to develop and offer a native-like user experience to users.
Regarding cross-platform app development, React Native is the first choice among developers. Owned by Facebook, React Native is an open-source, JavaScript cross-platform app development framework. Developers can create stunning UIs for mobile and web applications.
React Native developers mostly use native components and APIs to create highly responsive and smooth user interfaces. React, a JavaScript library, helps developers build interfaces that load quickly, offering a highly satisfying user experience. Native components help the app to render and execute code faster.
React Native app development is cost-effective and does not take much time. Thanks to extensive community support and several libraries and tools, developers can build feature-rich, scalable, and secure mobile apps with React Native.
The app development process with React Native is smooth sailing for developers. Features like Code Reusability help developers to use the same codebase for Android and iOS platforms.
You will need a team of experienced React Native developers with a proven track record in the domain. Expert developers with a thorough understanding of the framework and programming languages like JavaScript will help speed up the app development.
We will discuss the React Native app development process in detail, from idea to implementation, in this post.
Conceptualizing Your App
A good, feasible idea is the first fundamental requirement for any mobile app development process. You need to have a unique idea that addresses the concerns of your target audience. A potential idea uniquely identifies people's pain points and offers the right, convenient solutions.
For example, a personal budget app helps people manage their finances and budgets with a perfect bifurcation of bills, investments, incomes, and other aspects.
Defining the App Idea
All successful apps were ideas once. Potential ideas can turn owners' fortunes and help them address the issues their target audience faces. Instagram was conceptualized to allow users to post their personal stories through photos and videos. Similarly, WhatsApp was conceptualized to help people communicate smartly and flawlessly with their friends and family members.
However, defining the idea is what you need to understand whether the idea is commercially feasible or not. Putting the idea on paper is crucial to understand its feasibility.
This process is also called a Product Requirement Document (PRD). Here, you must write down everything you foresee about the idea, including your vision, purpose, specifications, features, and other aspects. A PRD will help the development team to understand your business requirements, needs, and other elements.
Market Research and Validation
The 2nd step is to understand the market.
- Is your app needed?
- Is there any similar app in the market?
- If yes, what are the features of the app?
- Who are your competitors?
- Can you identify the gap that your idea can fill in?
- How is the design of the app?
- What is the target audience of the app?
- How will you monetize the app?
These questions help you understand the latest market trends, competition, and opportunities. Most React Native app development companies prefer market research before developing.
Also, it is vital to study the prevalent consumer trends, market segment forecast research, and other crucial market research aspects.
Identifying Target Audience and Platform
If you want to address your target audience, you first need to know who your target audience is.
Do you have it?
If not, you need to find it.
There are various things that you need to know about your target audience, such as:
- Demographics
- Location
- Age
- Gender
- Occupation
- Education
- Interests
- Behavior
- User personas
- B2B or B2C (corporate or individual)
Sometimes, you might need to hire a market research agency to conduct in-depth research to identify your audience accurately.
Once you know your target audience, the next step is to discover the challenges they face. Also, you need to find incentives to help attract your users to use the app.
Also, knowing which platform your target audience uses will help you choose the right platform for your mobile app. Mostly, you will choose Android, iOS, or both (cross-platform app development) or the web.
Top 5 React Native App Development Ideas For 2024 That Can Attract Investors
As discussed, you need to have a fascinating idea with a good scope in the future. We have discussed some of them here.
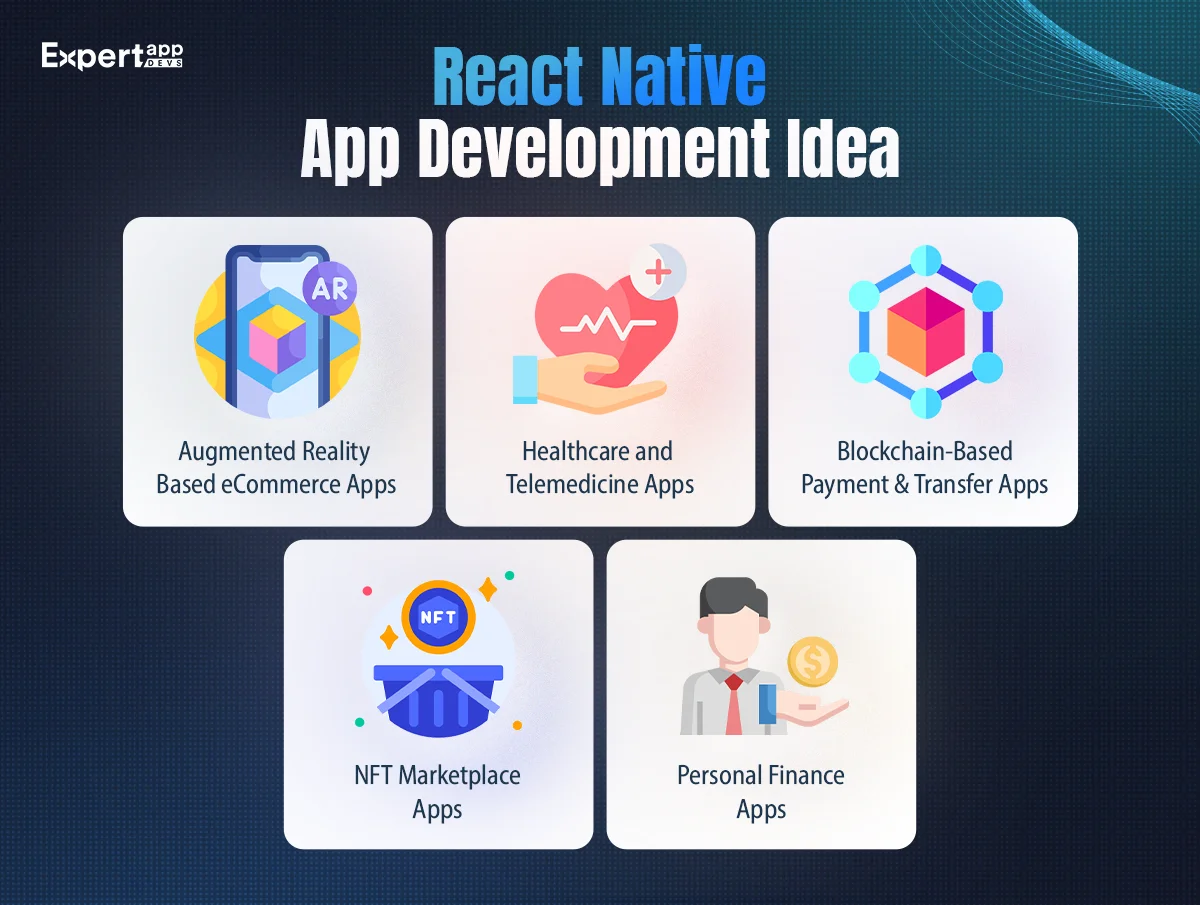
#1. Augmented Reality-Based eCommerce Apps
Augmented Reality (AR) is a promising technology that can help create immersive and highly engaging experiences in gaming and other areas. AR-based ecommerce mobile apps can streamline the shopping journey for users and make it more interactive and pleasant. Users can visualize products in 3D and can see how they look while using them. For example, if you are selling glasses, AR can show a user how he will look while wearing glasses.
#2. Healthcare and Telemedicine Apps
We all have seen how the healthcare infrastructure was tested during the COVID-19 pandemic. The telemedicine and healthcare industry can use mobile apps to diagnose and treat patients sitting in remote villages. Doctors and healthcare professionals can treat patients remotely with advanced features like video calling, health records, appointment booking, online consulting, etc.
#3. Blockchain-Based Payment and Transfer Apps
Blockchain decentralizes authority. It is a rapidly growing technology in finance and its sister industry verticals. Blockchain technology works on the ledger concept that all system stakeholders manage. Everyone in the system will be notified if someone changes the records in the ledger. Using blockchain in payment and fund transfer applications will improve transparency in the system.
#4. NFT Marketplace Apps
An NFT marketplace is a blockchain-based online platform where users can trade in non-fungible tokens, also called NFTs. These NFTs are unique crypto assets that can be bought and sold through a shared marketplace. The popularity of NFT marketplaces is increasing. Some popular NFT marketplace apps are OpenSea, Rarible, SuperRare, and Binance NFT.
#5. Personal Finance Apps
There is a wide range of financial products available in the market. For an individual, managing their financial portfolio is a challenging task. You can lend a hand by developing a comprehensive personal finance app that helps manage all economic activities like funds, FDs, stocks, mutual funds, and other investments. With advanced features like account integration, AI algorithms, real-time spending, and tracking financial assets, you can capture the market share instantly.
3 Benefits of React Native for App Development
What are the benefits of choosing React Native for your mobile app development? Let's discuss some of them.
#1. Cost Efficiency and Resource Optimization
The React Native framework allows developers to build apps for multiple platforms using a single codebase. If you are a startup and want to launch an app in the market instantly, you can go for cross-platform app development with React Native. As you don't have to hire two separate teams for Android and iOS development, you can cut costs by a significant margin. In addition to that, you can also optimize your resources accordingly.
#2. Hot Reloading and Performance
The Hot Reloading feature of React Native allows developers to view changes in the app in real-time without refreshing the app. It saves developers time and effort. Also, this feature improves the overall performance of the app.
#3. Community Support and Ecosystem
Active community support is another reason developers prefer React Native. It has a wide range of resources available for you. For example, React Native documentation to learn about React Native and its usage with tutorials, API references, and other stuff. Also, you can use the React Native Slack channel, an active chat room for developers. Here, you can participate in conversations or ask questions. The React Native Github repository allows developers to find source code for the framework. Furthermore, you can also join React Native community events to meet new developers and share knowledge.
React Native Architecture
Before proceeding further, we need to understand React Native architecture to learn how it works.
Understanding React Native Architecture:
Recently, React Native launched a new mobile app development architecture. The old React Native architecture had some performance and flexibility flaws addressed in the new one.
The old architecture had three threads: JavaScript, Main, and Shadow Thread. The main issue with the architecture was communication between these three threads.
The dependence on asynchronous JSON threads through the bridge was the biggest hurdle. The communication issue between these threads was causing unnecessary delays, uncertainty, and other issues.
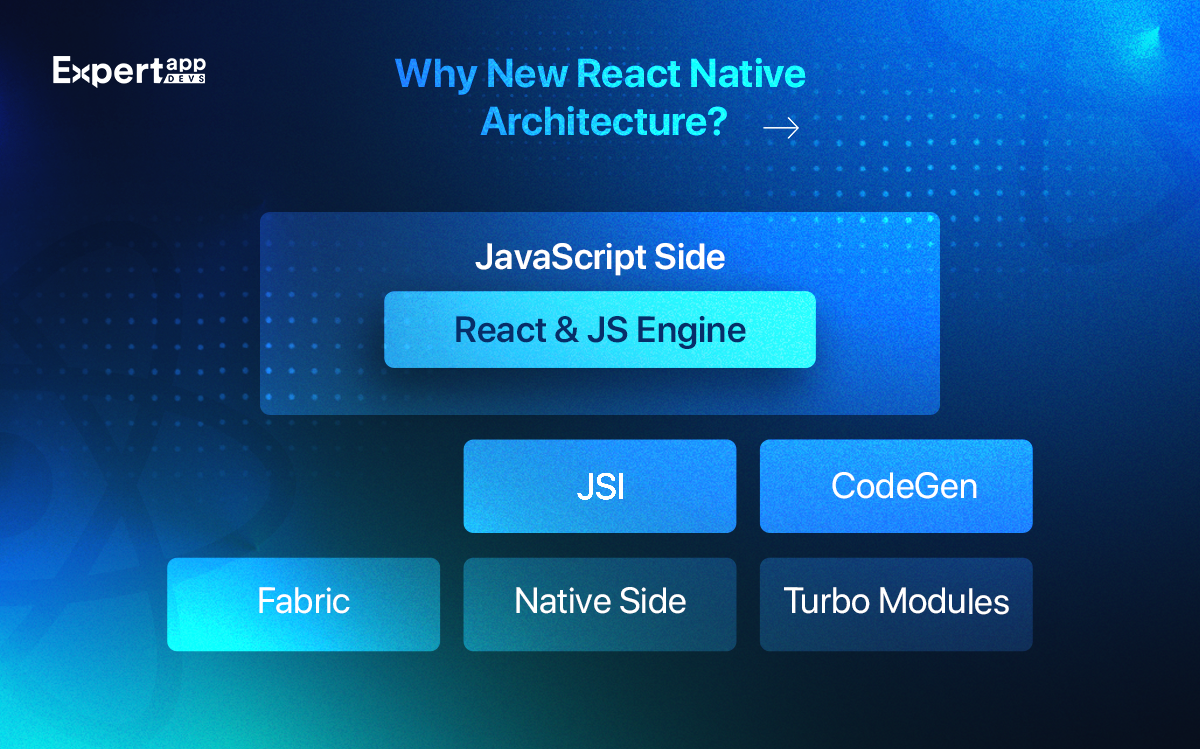
The new React Native architecture has a set of tools, libraries, and features to build scalable apps. The new architecture perfectly addresses the issues of the old architecture.
#1. JavaScript Interface (JSI)
The JavaScript Interface is fundamental to the new React Native architecture. It is an API powered with C++ programming language that interacts with any JS engine. Unlike the asynchronous bridge of the old architecture, the JavaScript Interface is highly synchronous to invoke native functions quickly.
The JSI removes the asynchronous communication between JavaScript and native components. It also allows JS to hold references to C++ host objects.
#2. Fabric
Fabric is a replacement for the older legacy rendering system. The main aim of introducing Fabric is to improve communication, performance, and interoperability with host platforms. This new render system uses asynchronous rendering and a new algorithm to improve the app's performance. It also takes less time to update the UI. Developers also find it easy to handle with advanced animations and interactions. Moreover, it is smooth sailing for developers to implement Fabric for server-side rendering for React Native.
Fabric is still under development. However, we can bet on it as it shows fascinating results in performance and inoperability.
#3. Turbo Modules
Developers can use Turbo Modules in React Native app development to start the app quickly. Turbo Modules are new Native modules that eliminate the loading problems with lazy loading modules. Turbo Modules allow bypassing the JavaScript bridge and communicating directly with the native modules.
Turbo Modules are type-safe. You can rest assured that the data from the module is accurate and correct. You can mitigate the number of bugs in the app.
#4. Codegen
Do you want to eliminate the task of writing repetitive code? Codegen is specially designed for you. Codegen invokes automatically when the app development process starts every time for Android and iOS development.
Codegen scripts are located in the React Native NPM package. It is also under development, and developers are working on possibly automating the compatibility between JavaScript and Native. Codegen also guarantees type-safety and compile-type safety. With Codegen, developers can have far simpler code and quick execution.
#5. Redux

Developers can use Redux for app state management. It is a state management library where you can store the state you want to use throughout the app development process. In addition to that, developers can use Redux with any JavaScript library and framework.
Developers need to install Redux and React-Redux packages to use this phenomenal library. With Redux, you can have an app that flawlessly and consistently runs across various environments. React Native has developed the Redux toolkit called Modern Redux, which allows developers to learn and write Redux logic meaningfully.
Threads in React Native
When you open a React Native app, the device will start three main threads. Also, there will be some additional background threads as per the needs.
#1. Main Thread:
The application will run on the main thread. This primary thread is responsible for various tasks like user interactions, UI rendering, etc.
#2. JavaScript Thread:
The JavaScript thread is responsible for the execution of the business logic of the application (JavaScript and React code).
#3. Shadow Thread:
The device will launch a Shadow thread with a JavaScript thread. The main task of this thread is to compute the view positions and the tree layout construction coded in the JS thread. Yoga is a layout engine that React Native uses to convert flexbox-based layout into a native host-friendly layout system.
#4. Native Modules Thread:
This thread will be launched when the app needs access to a platform API like camera, location, etc.
Realms in React Native
There are two realms in React Native called JavaScript Realm and Native Realm.
#1. JavaScript Realm
The JavaScript Realm is where developers program the React Native app in JavaScript. Here, the code runs on a JavaScript engine called JSCore.
#2. Native Realm
Here, developers write code with platform-specific languages like Objectove-C and Java. In this realm, the main UI thread can create background threads if needed.
React Native Components and Navigation
The best thing about React Native is that developers can write the UI code with JavaScript instead of Kotlin and Swift. To invoke native views, developers can use core and native components.
#1. Hooks and Functional Components
Hooks replaced all the class component use cases in 2019. Furthermore, significant React Native libraries like React Navigation 5.0 and React Redux 7.1.0 support Hooks. With Hooks, developers can easily split components into smaller functions. Also, developers can manage the component's local state with a reducer.
#2. Core Components and Native Components
In React Native app development, you will need advanced features like tab navigation and others to offer a native-like user experience to users. Mostly, developers use a JavaScript library called React Navigation for app navigation pattern implementation. This library comprises multiple native libraries like Reanimated, Gesture Handler, etc.
Also, React Navigation helps developers to structure and navigate the app screens.
#3. Referential Transparency and Static Type Checking
React Native app development is based on functional programming, though JavaScript supports functional and object-oriented programming.
React, a JavaScript library used in React Native app development ensures that all components written by multiple people work excellently together. If the input is kept the same, you will get the same output with React.
Developers also use static type checking and unit testing for transparency. This is done by using tools like TypeScript and ESLint.
#4. Wrapping Dependencies
Third-party libraries used by developers help to simplify the app development process. However, sometimes, these libraries need to provide advanced features and functionalities. Switching from one library to another will add up costs in such scenarios. You can use the wrapping philosophy here by wrapping the API around libraries. One thing that you should consider is ensuring platform portability while using the wrapping libraries with custom APIs.
#5. Reanimated 2
Animations make the app look impressive and immersive. React Native developers use Reanimated 2, a JavaScript library, to build highly functional animations for the app. As it runs on the UI thread, you can develop animations even when the app is busy. The library comprises many hooks and functions to write clean code. Beautiful and creative animations can improve user engagement and experience.
Designing of the React Native App
UI/UX Design Principles for React Native
Developments must follow UI/UX design principles to ensure highly immersive and impressive app design. Some principles are discussed here:
#1. Native look and feel:
Make sure that the app looks and feels like a native app. Developers must follow all the platform-specific UI/UX design principles and use the UI components to offer a seamless, native-like user experience.
#2. Performance:
Developers must write clean code to ensure top-notch app performance. The app must be fast and highly responsive. Avoid adding unnecessary animations and features that might clutter the app.
#3. Accessibility:
Design the app in a manner that everyone should access the app, including people with disabilities. Carefully read and follow accessibility guidelines and add alternative text for images to ensure high-end accessibility. Test the app thoroughly on different devices to ensure accessibility.
#4. Usability:
Developers must design the app to ensure high-end usability and navigation. Avoid complex interactions to keep the navigation smooth and user-friendly. Getting user feedback can help identify and fix usability issues.
#5. Visual Hierarchy:
The app must have a clear visual hierarchy by using various fonts, colors, and animations that clearly define the most critical elements of the app.
#6. Consistency:
The app should be consistent in design and not cluttered and disoriented. Developers must use the same UI components and design patterns to ensure a good level of consistency. Using a component library can help developers create a highly consistent design.
Creating a User-Friendly Interface
The user interface is the first element users will notice while opening the app. Your app's UI will determine the app's success. You have to follow a zero-compromise policy on UI to ensure high user engagement. Make sure that the UI is consistent, impressive, and user-friendly. Here are some tips to create a user-friendly UI.
- Keep the UI simple, clean, and uncluttered to ensure maximum engagement.
- Go for a consistent typeface, style, font sizes, colors, and layouts throughout the app.
- Reduce cognitive load on the app to improve the loading time.
- Test the app with real users to get their valuable feedback and use this feedback to improve the UI.
- Research user preferences, personas, and interests to create user-centric UIs.
- Keep the language of the app simple and easy to comprehend.
- Use typography to add some visual richness to the app. It also helps to create an app with smooth navigation.
- Also, you can use images and videos to keep the UI exciting and engaging. Try to tell a story through images and videos to engage your users instantly.
Ensuring App Security and Data Protection
Understand the importance of app security and data protection. In an era where cybersecurity has become a growing concern, you must strengthen the app's security. Use all possible security measures to prevent attacks and mitigate data security risks.
Development Phase
#1. Setting Up the Development Environment
It depends on the expertise of the React Native developers to kickstart the project. For example, if you are new to cross-platform app development, you should go with Expo Go, a framework with a wide range of tools and services to build React Native apps. With Expo Go, you can start developing a React Native app quickly. All you need is the latest Node.JS version and a phone or emulator. Also, you can try Snuck, another React Native tool if you want to start React Native directly in your browser.
If you have hired a reputed React Native app development company, you can go for React Native CLI. You will require Xcode or Android Studio to start the project with React Native CLI. Installing these tools will take an hour or two to get you started.
#2. Implementing MVVM architecture in React Native
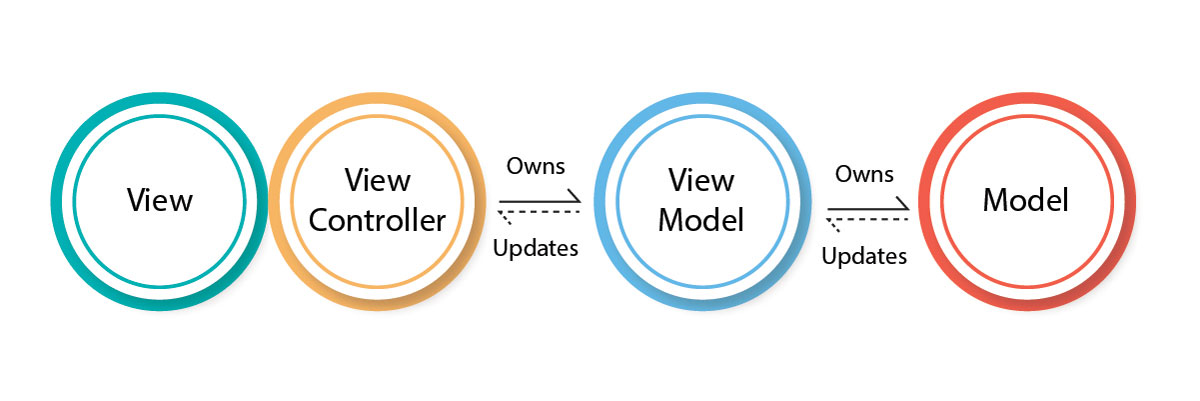
If you are familiar with mobile app development, you must have heard of the MVVM architectural pattern. It is mostly used to build highly impressive user interfaces. This three-layer architecture (Model-View-ViewModel) can separate the UI, the data, and the logic. It makes the code easy to maintain and access.
For the implementation of MVVM in the project, you will need to create three components, one for each layer. The View component will render the user interface. The Model component will store and manage data and the ViewModel component will become an intermediary between the View and the Model components. It will first receive data from the Model component and expose this received data to the View. Also, the MVVM component will take care of user interactions and model updates.
#3. Utilizing React Native Components and Libraries
React Native components and libraries are bliss for developers. These components can speed up the development process and build highly consistent applications. However, developers must ensure they choose the right components and libraries for the project.
Let's Check Out Some Essential React Native Components and Libraries in Brief:
React Native Elements: This library has 200+ components to be used by developers. All these components follow the guidelines of Google's Material Design.
NativeBase: if the developer wants to build Android and iOS applications, this library can be helpful as it is based on Android and iOS principles.
React Native UI Kitten: It has 40+ components designed to make the app immersive, beautiful, and attractive.
Apart from component libraries, developers can also use various other libraries in the development process. The React Native Vector Icons library has 1,000+ icons that developers can use in the application.
Here is a list of things to keep in mind while using React Native components and libraries:
Carefully use the libraries and components according to the project's needs.
Always use current libraries and components to avoid bugs and security vulnerabilities.
Each component and library has its own documentation. Read it carefully to understand how to use it perfectly and accurately.
#4. Integrating Firebase for Backend Services
React Native developers use Firebase for backend services to add advanced functionalities, such as real-time database, authentication, etc. You will need an experienced React Native developer to integrate Firebase into the app.
Also, while integrating Firebase, you must remember to handle error cases. Also, the developer must follow the documentation to implement specific services. Securing Firebase credentials is also equally important to mitigate security risks. You can visit https://firebase.google.com/docs to learn more about Firebase and access documentation.
Firebase allows developers to add compelling features to the app without building them from scratch. It saves the time and effort of developers and helps them create robust apps.
#5. Ensuring Cross-Platform Compatibility with React Native for Web
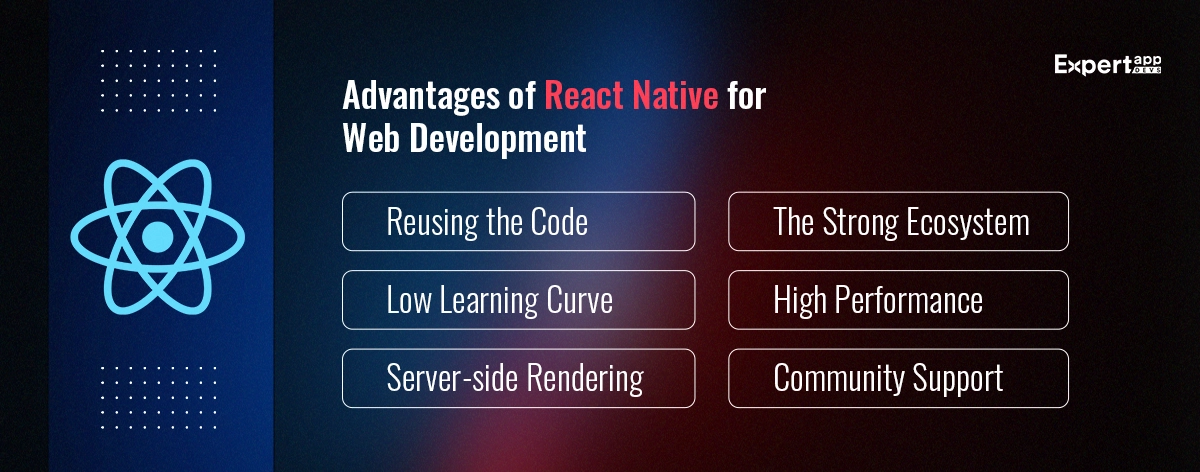
Do you know React Native can also be used to develop web applications? Developers must ensure cross-platform compatibility with React Native for the web while developing a mobile app to ensure that the app runs seamlessly on mobile and web platforms. If you want to go for cross-platform compatibility with React Native for web, here is a list of steps:
Step 1: Setting up the Project
First, you must create a new project with the React Native CLI. Developers need to install the dependencies with the React Native web package.
Step 2: Code Structure
Developers must organize the codebase in a manner that ensures code reuse. Developers must create folders for each component, screen, style, and resource. Developers can keep separate platform-specific code by using .native.js and .web.js file extensions.
Step 3: Component Selection
Developers must use components that are highly compatible with web and mobile platforms. Components with specific functionalities or styling limited to a single platform must be avoided.
Step 4: Styling
Consistent style is highly crucial for any application. Developers can use the StyleSheet API for consistent styling across various platforms. Experts recommend using CSS properties to be consistent across web and mobile platforms rather than platform-specific styles and properties.
Step 5: Platform-Specific Code
To write platform-specific code, developers can use the platform module to write and execute code conditionally for a specific platform.
Step 6: Testing
Developers must test the app on web and mobile platforms to check cross-platform compatibility. They can use testing tools like Jest and React Native libraries, such as react-test-renderer, to test the app.
Step 7: Deployment:
Keep in mind platform-specific requirements and guidelines while deploying the app. To deploy the app for the web, developers can use platforms such as Netlify, Vercel, or Firebase Hosting.
Step 8: Continuous Integration:
Developers can set up a CI (Continuous Integration) system to build and test the app automatically on various platforms. It will help them to identify and address compatibility issues.
Testing the App
Testing the React Native app is integral to the React Native app development process. You need to test the app to ensure you are deploying the app with security vulnerabilities, potential bugs, and other technical issues. Let's check some testing types to consider for thorough app testing. Experts suggest to hire professional React Native app development services provider for the testing part.
#1. Unit Testing:
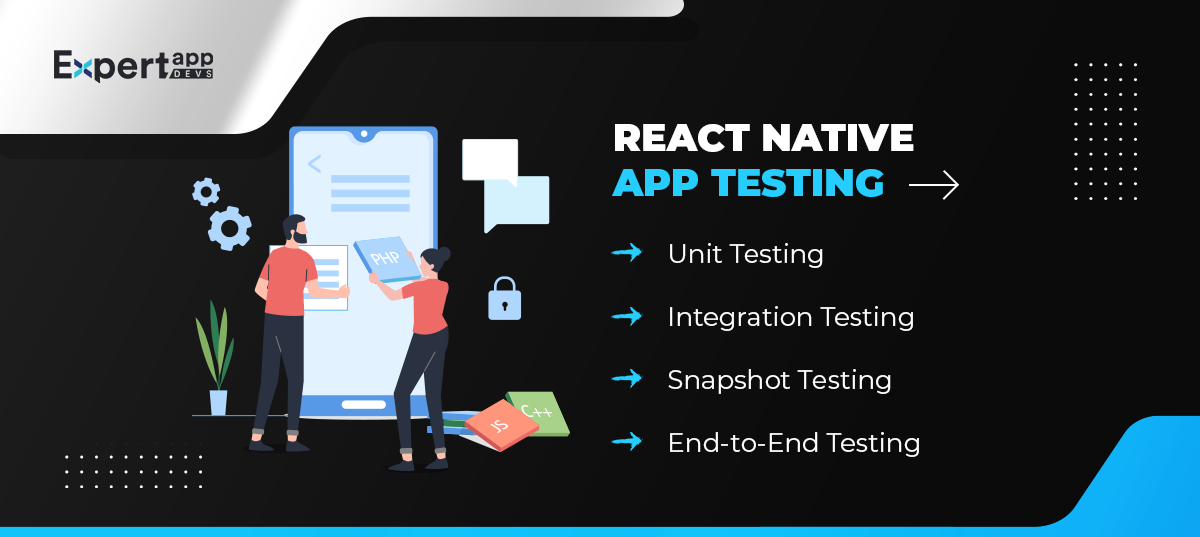
Unit testing is the simplest form of testing the app, where developers test the individual code units, such as functions, components, and modules. The main aim of unit testing is to ensure that all the code units work as expected. Developers mostly use Jest and Enzyme for unit testing.
#2. Integration Testing:
Integration testing ensures the proper collaboration of various components and modules. Developers check whether these components and modules work together perfectly or not. It also involves testing user interactions with the app and screen navigations. Developers use tools like Detox and React Native Testing Library for integration testing.
#3. Component Testing:
Developers test React Native components in isolation to verify a component's behavior and rendering based on various input scenarios. Developers use Enzyme and React Native Testing Library for component testing.
#4. End-to-End (E2E) Testing:
As the name suggests, E2E testing is a type of testing method that tests the whole application, including all the components, functions, features, etc. The app ensures that all the parts of the app function correctly and as per expectations. They use testing tools like Cypress, Appium, and Detox for E2E testing.
#5. Snapshot Testing:
During the Snapshot testing method, developers take snapshots of the component's rendered output and match it with the previous snapshots. The aim is to identify and address unintended UI changes or component rendering. In React Native development, Jest is mainly used for snapshot testing.
#6. Performance Testing:
This is the most crucial testing type, as it involves the overall performance and responsiveness of the app. Developers evaluate the app's performance and responsiveness under various conditions, like varying loads, network speeds, etc. With this testing, developers can find potential performance issues. They use mostly React Native Performance and Reactotron for performance testing.
#7. Accessibility Testing:
If you want people with disabilities to access your app without any hassles, accessibility testing is crucial to perform. Developers test various features, such as screen readers, navigation, text contrast, etc., to ensure the app offers a seamless experience to people with disabilities. They use testing tools like React Native Accessibility Info and AXE.
Debugging with React Native Debugger
Debugging is all about identifying and addressing errors and bugs in the app. It is a vital part of the React Native app development process. React Native Debugger is the official tool used to debug React Native applications. Here is the process of using React Native Debugger to debug the app.
- First, you must install React Native Debugger from the GitHub repository. You can also download it from the official website of React Native. Also, developers must check whether they have installed necessary dependencies, like Node.JS and React Native CLI.
- Once you have installed it, open React Native Debugger and then open the app on a simulator. You must shake the device or use the keyword shortcut (Cmd + D for iOS and Cmd +M for Android) to access the developer menu. Select Debug JS Remotely or Debug in Chrome to connect the React Native Debugger to your app.
- Now, you can access various debugging tools for your app, such as Elements, Network, Console, Sources, etc.
- If developers use Redux for state management, React Native Debugger seamlessly integrates with Redux DevTools. You can easily access Redux in React Native Debugger by clicking the Redux tab.
- Also, with React Native Debugger, you can debug the native code. All you need to do is use the Debugger tab to attach your code to the Debugger.
With React Native Debugger, you can debug your React Native app effectively. With many tools, you can quickly inspect, test, and manipulate components, states, network requests, etc. Developers can quickly identify and address issues in the app.
Preparing for iOS 17 and Android 13 Updates
Do you want an advanced React Native app compatible with iOS 17 and Android 13 updates? Follow these instructions for that.
- Always use the latest React Native version to ensure it supports Android and iOS.
- Keep React Native documentation and release notes to stay updated.
- Ensure you thoroughly check your app on iOS 17 and Android 13 devices. Ensure that all the functions work correctly.
- If you have used any third-party libraries, plugins, or dependencies, ensure they are updated to their latest versions.
- The new versions of Android and iOS come with new design guidelines. Ensure the app follows all the latest design guidelines and offers a consistent user experience.
- If there are any security and privacy-related changes in the updated versions, you must ensure that the app adheres to those changes.
- If there are any performance optimizations in the new Android 13 or iOS 17 devices, use them in your favor to improve the app's overall performance. Features like new APIs, optimizing resource usage, leveraging new features, etc.
- Test the app for various Android and iOS devices to ensure that the app functions perfectly. Test the app on different screen sizes, device orientations, network conditions, etc.
- Learn more about the new iOS 17 and Android 13 app store guidelines and ensure that your app meets those guidelines.
- Keep reading the latest changes in the documentation, community forums, etc., for any updates. Gather insights by actively participating in the developer forums.
Deployment
The next part of the React Native app development process is deploying your app on Android and iOS devices.
React Native App Deployment Process
#1. For Android:
To deploy the app on the Google Play Store, all you need to do is follow these steps.
Step 1: Digitally Signing your Android app
Before you deploy your app, you need to sign up for the app for security and encryption digitally. For that, you will require a release key. This key will help you sign all future updates. It is crucial to safeguard the key to access to the app. You can use Google's feature called Play App Signing. Also, you will require an Upload Key to generate to sign all the updates. Also, you can use your upload key as a release key.
You can use Java Keytool to generate the upload key for your app. When you run the keytool, you have to enter a password. It would help to remember this password, as you will need it for app signing.
Also, you have to add a few details, like name, location, organization, etc. to generate a key.
Step 2: Updating Gradle Files
Now, it is time to update Gradle files. It will help you to get your app signed with it.
Step 3: Generating The APK Release Build
Now, you are ready to generate the release build. Go to the Android directory and run the release build. You will have an optimized bundle in AAB format. Google has made it mandatory to generate the release build in AAB format to generate optimized APKs for different device configurations.
Step 4: Testing the Release Build
You can use the following command to test the Release build.
npx react-native run-android --variant=release
Uninstall any previous debug build if you have one on your phone to ensure React Native does not throw an error.
#2. For iOS:
To deploy the React Native app to iOS, you need to follow the steps mentioned below:
Step 1: Create CertificateSigningRequest
First of all, create CertificateSigningRequest from your Mac. You need to open the Keychain Access to your Mac device and go to Keychain Access > Certificate Assistant > Request a Certificate From a Certificate Authority.
Add the required details and select "Saved to Disk" as the "Request is" option.
Now, click Continue to generate the CSR file and submit the file to your certificate authority. They will verify your details and issue a certificate. Save the certificate on your computer.
Step 2: Create Certificates, Identifiers, and Profiles
The next step is to create certificates, identifiers, and profiles. You need to sign in to the Apple Developer website, enter your credentials, and then navigate to Certificates, Identifiers, and Profiles.
Step 3: Build Archive APK
You must build an Archive APK by opening your React Native project in Xcode.
Step 4: Follow these steps
- Open your project.
- Select the branch you want to build.
- Now, select the Schema and then select Any iOS device.
- Select Target and then click on Signing & Capabilities.
- Now, go for Setting Bundle Identifier and select Provisioning Profile for Debug.
- Then, go for Setting Bundle Identifier and select Provisioning Profile for Release.
You can create an Archive by selecting Archive in your Macbook Xcode bar's product menu.
Step 5: Create Apps in App Store Connect
- You need to create an App Store Connect. Clock on the "+" button and choose the iOS platform. Add the required information and then click on "Create."
- It will lead you to the App Store Connect page. You must configure various app aspects, like pricing, versions, etc.
- Submit your app for review and distribution.
Step 6: Generate Archive to file .ipa and upload to App Connect.
- To generate Archive to file.ipa, open the folder archive Xcode, select Archive, and click on the Distrubite app.
- Now, select App Store Connect.
- Click on Upload and then Next.
- Select the correct certificate and tap on Next.
- Click on the Upload button.
Step 7: Add to review
- You will need another version of the app to be submitted for review.
- Click on "+" and add the application.
- Click on the Done button, save it, and then add it to the review.
App Store Optimization and Submission
Optimizing your app for App Stores is also a vital aspect to consider. It is an inbound marketing technique called App Store Optimization. It would be good to hire a React Native app development company with extensive experience optimizing store apps. You can use various app store optimization techniques to rank your app in the search for relevant keywords.
Maintenance and Updates
Maintaining your React Native app and releasing regular updates help engage your target audience and improve user experience.
#1. Strategies for Regular App Maintenance
Here are some React Native app maintenance tips and tricks you can follow.
- Keeping the bundle size small will help you keep your app fast, high-performing, and easy to download and install.
- Ask your developers to keep the code clean and follow the best coding practices.
- Using native modules will help access platform-specific features to improve user performance.
- Keep a continuous integration and deployment practice to make the maintenance part simple and effective. You can use CI/CD tools like Jenkins, CircleCI, and Travis CI.
- Keep sophisticated documentation throughout the app development process to simplify maintenance. Well-written documentation helps developers have reference points about app architecture, features, code structure, functionalities, etc.
#2. Implementing Updates and New Features
Also, it is essential to update your app regularly. Regularly updating the app will improve user experience and engagement. Furthermore, add new features and functionalities to the app to make it more engaging and top-notch.
#3. Monitoring App Performance and User Feedback
Once the app is deployed, your work does not stop. You need to continuously monitor the app's performance and release new updates based on it.
By monitoring your app's performance, you will learn about user acquisition, user engagement, the number of downloads and abandonments, app crashes, technical or functional errors, in-app purchases, user demographics, etc.
Such valuable data insights will help you upgrade your app by making data-driven decisions that can help improve performance and engagement.
Also, you can get precious insights by keeping a tab on user feedback. Regular users will indeed write reviews about their experiences. You can get valuable insights to improve your app's features, performance, etc.
Scaling the App
Regularly scaling the app will help meet users' expectations and your business goals. Even when your app performs excellently, you will need to scale up the app from time to time to get a competitive edge.
#1. Optimizing App Performance
There are various ways you can employ to optimize your react native app's performance. Some of them are discussed here:
- Keep the size of the app small. Larger apps might consume more resources. Discuss this thing in detail with the React Native developers. Try to reduce the size of the app.
- Optimize the app in a manner that minimizes network usage.
- The size of images and videos used in the app might impact its performance. Try to optimize images and videos to improve the app's performance.
- Optimize the app for different devices to get a consistent user experience across all devices.
- Follow standard coding practices to ensure the app runs smoothly without any performance issues.
- Keep a habit of deleting outdated cache data regularly to improve the speed and performance of the app.
- Ensure that the app delays heavy activities until the first screen is rendered. It will help you quickly start the app.
- Use various performance APIs.
- Ensure the app's navigation flow is intuitive, impressive, and compatible with gesture controls.
#2. Incorporating AI and IoT for Advanced Functionalities
You must have seen various face-swapping mobile apps that use Artificial Intelligence to allow people to swap faces. Incorporating emerging technologies like AI, BL, AR, VR, IoT, etc., can help add advanced functionalities to the app.
You can use AI and IoT to streamline processes, strengthen security, predictive maintenance, asset management, real-time machine condition monitoring,
Not just that, with AI and IoT technologies, you can also get many benefits:
- Personalized user experience
- Process automation
- Advanced features and functionalities
- Better customer engagement
- Highly engrossing user experience
- Improve the quality of services
- Superior customer support
- Understanding user's behavioral patterns
- Natural language processing
- Better product recommendations
#3. Expanding to Different Markets and User Groups
You also need a comprehensive marketing strategy to expand your business to different markets. Here is a list of tips to boost your app to other markets and user groups.
- Analyze your competitors and find the opportunity gaps. Knowing their strengths and weaknesses will help you add new features and functionalities to your app.
- Identify the user group you want to target based on demographics, interests, behavioral patterns, etc.
- Define an app store optimization strategy for the new markets.
- Also, focus on CLV (Customer Lifetime Value) to retain your existing customers and offer value-added services to them.
- Use emerging technologies, like Artificial Intelligence, Machine Learning, the Internet of Things, etc., to add attractive features to the app.
- Create user personas based on their pain points, content types, tones, voices, and visual branding patterns to create an impactful app marketing strategy.
Real-World Case Studies
Check out some real-world React Native app case studies for more glimpses.
#1. Analysis of successful React Native apps
React Native is owned by Facebook. They have used the technology to build their mobile apps for iOS and Android platforms. The main reason Facebook invented React Native was to bring all the benefits of web development to mobile. Earlier, Facebook developed React Native to support iOS. Now, React Native can provide mobile UIs for both Android and iOS platforms.
Using React Native to build official mobile apps, Facebook enjoys high-performing apps with a quick event dashboard startup. We can see how fast and high-performing the Facebook app is with the best user experience.
Facebook Ads
Facebook Ads was the first React Native app to be built for Android. With the code reusability feature, developers made two separate apps with a single codebase. Facebook Ads is not a native app, but it looks and feels like a native app and offers a seamless user experience by leveraging the native features of both platforms.
Facebook Ads has a clean UI with highly intuitive UX and simple navigation. Also, the app seems uncluttered, and the animations used in the app look perfect and natural. The reason why Facebook used React Native was simple. They were looking for a framework that could handle complex business logic to address various challenges and differences in ad formats, multiple currencies, different time zones, conventions, etc.
Facebook Ads opens quickly, is fast, and navigates seamlessly between two screens, offering a highly satisfying user experience.
Walmart
Walmart is one of the fastest-growing online retailer firms. They have recently developed their mobile app with the React Native framework and joined the cross-platform app development train.
Walmart has specific goals to pursue. They want to become the world's largest online retailer, so they opted for React Native, which can offer the best user experience and engagement.
As React Native apps offer a native-like look and feel, they are the perfect choice for any business that wants to provide the best-streamlined experience to its audience.
Within a shorter period, Walmart was able to build a fast-performing app for Android and iOS platforms. To create a fast-paced app, almost 96% of the codebase was shared between Android and iOS platforms. In addition, code rewriting for React Native also allowed developers to leverage cross-platform compatibility, code reusability, and access to custom native components.
#2. Lessons Learned from Enterprise-Level Deployments
Deploying a React Native app in complex enterprise environments has its challenges. Here, we have discussed some lessons while deploying apps in enterprise-level deployments.
- Clear communication between all the stakeholders is crucial to bring everyone on the same page. Ensure all stakeholders know the goals, timelines, challenges, and limitations.
- Keep in mind scalability goals while developing a React Native application architecture.
- Testing is one of the core aspects not to mess with. Test the app thoroughly throughout the development phase to address potential issues.
- Have a robust monitoring system to ensure maximum resource optimization, performance tracking, and real-time error tracking and rectifying.
- Be prepared for unprecedented errors and challenges throughout development and take proactive steps to mitigate them.
- Accept feedback and suggestions and adapt your approach based on them to develop future-ready outcomes.
The Business Perspective
#1. Cost Factors in React Native App Development
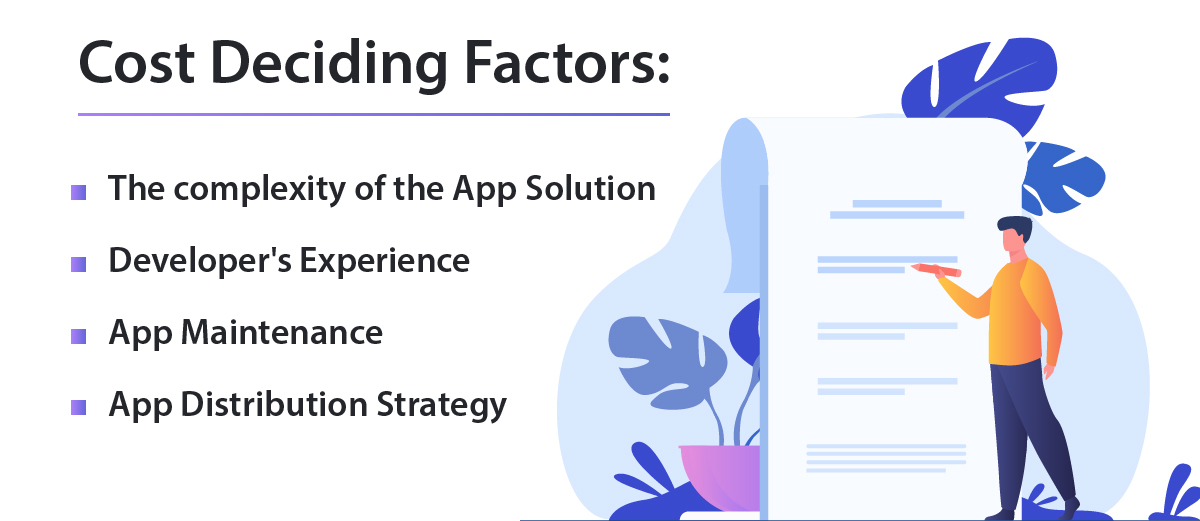
Various factors determine the cost of your React Native app development project. Let's check out them.
Complexity:
If you plan to develop a complex app with complex features and functionalities, you must spend more. The more complex the app is, the more time and effort it will need, resulting in more cost.
Features:
If you want to add more advanced features and functionalities, you should spend more. For example, AI-based features or push notifications will cost you more.
Design:
UI/UX ensures user engagement and a better user experience. If you want to develop a user-friendly and engaging app, it will cost you more.
Development Team:
The type of developers you hire will also determine your app's cost. For example, if you have hired experienced React Native developers, it will cost you more than beginners. Also, the development team's location will affect your app's cost. For example, if you have hired React Native developers from India or Ukraine, it will cost you less compared to developers from the USA.
#2. Why Startups Should Consider React Native?
Startups usually face budget constraints. Hence, most startups go for cross-platform app development with React Native. Here is the list of reasons why startups should consider React Native.
Performance:
React Native apps are excellent in performance and speed. This is why businesses and developers prefer it for cross-platform app development. These apps can run code faster on Android and iOS devices.
Cost-effective:
As discussed, you don't need to hire two separate teams for Android and iOS platforms. Hire React Native app developers for the job; they will take care of the rest.
Code Reusability:
You can build two apps for Android and iOS with a single codebase. It saves developers time and effort. The code reusability feature also leads to quick development.
Development flexibility:
With React Native, you can build an app that can run on web browsers, not just for Android and iOS platforms.
Code Stability:
As it is built on JavaScript, you can rely on the React Native framework for its trustworthiness and code stability.
Easy to use:
React Native is an easy-to-use framework for developers who know React and JavaScript. Also, it is easy to find experienced React Native developers.
#3. React Native for Enterprise App Development
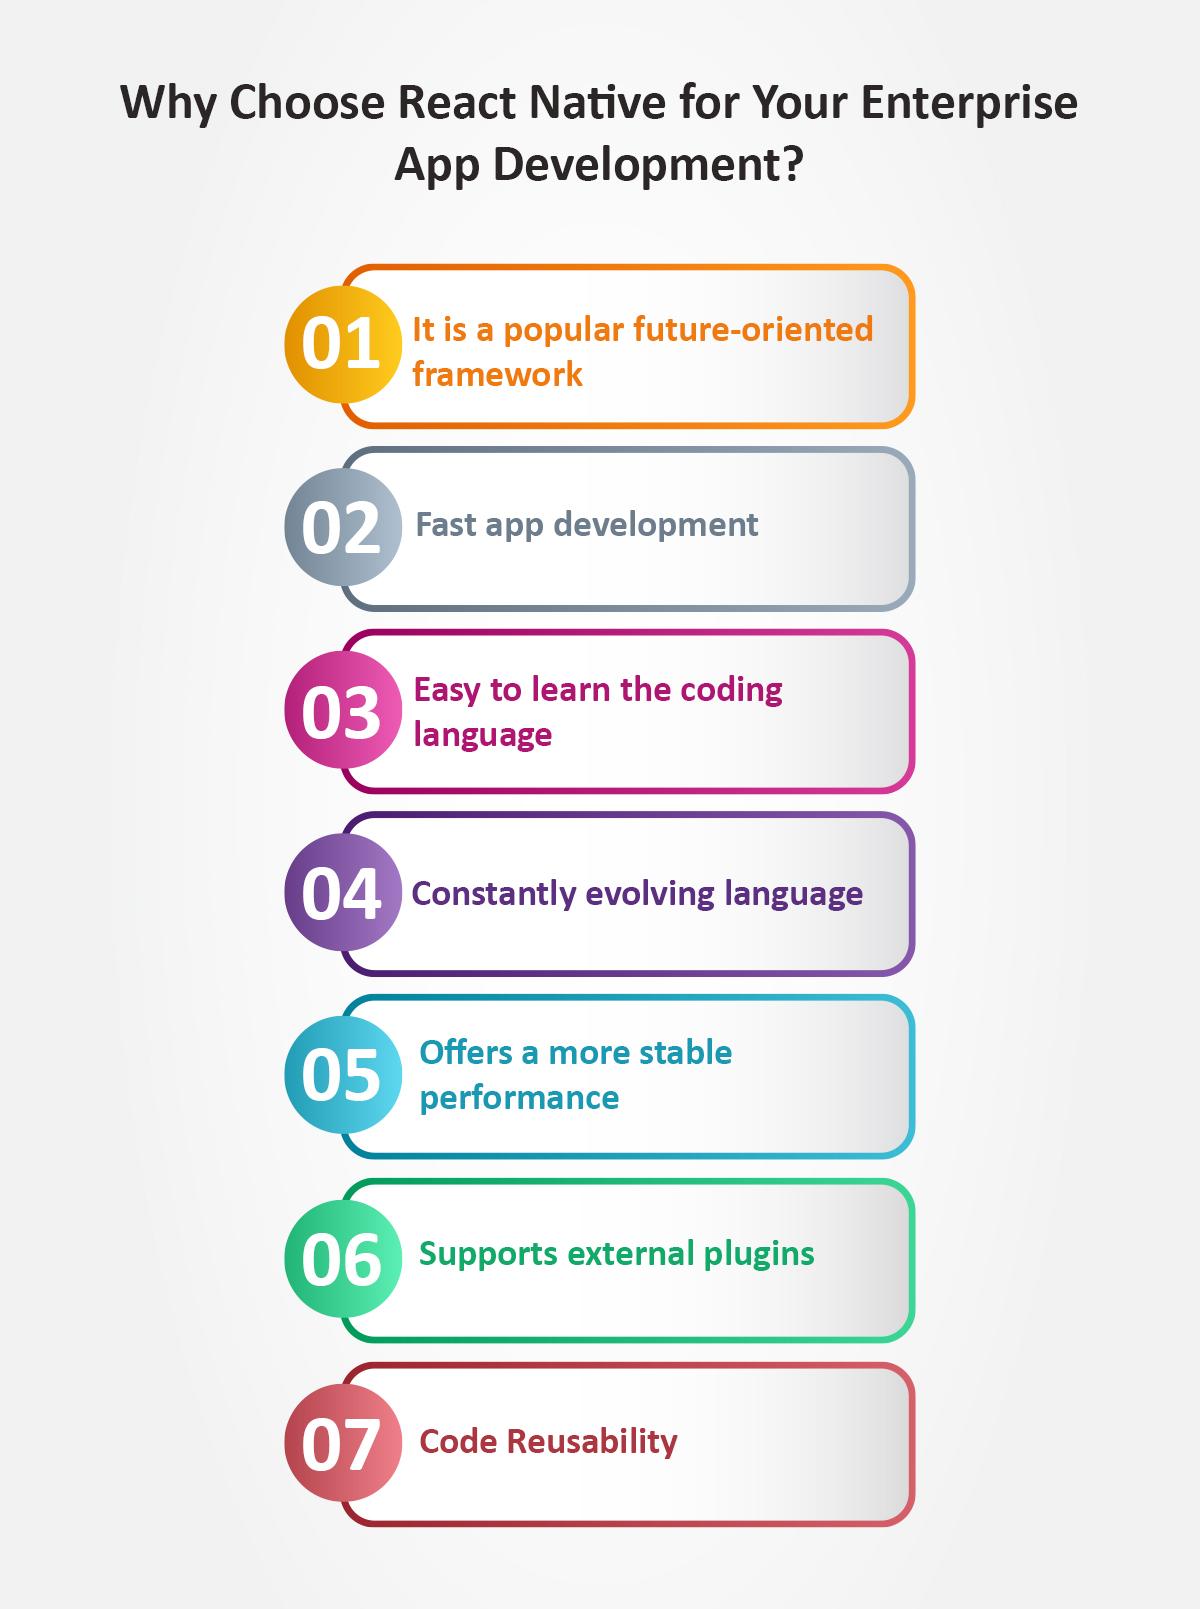
React Native is the most viable option to build enterprise applications. You can create an app with advanced features and functionalities for multiple platforms with a single codebase.
With minimum resources, you can build high-quality mobile apps, and that too at lesser costs. Also, the components and tools that React Native offers quicken the development time. These apps can provide a native-like performance and feel because they are natively rendered. Also, the active community support helps developers resolve issues instantly with the available resources and tools.
Future of React Native
It is crucial to understand what the React Native framework has in its sleeves for the future.
React Native Future Trends and Predictions
Security is one of the critical areas where React Native will improve. You will see future React Native versions with advanced security measures like encryption methods, data storage options, etc.
Also, experts predict React Native will be easy to integrate with emerging technologies, such as Artificial Intelligence, Machine Learning, the Internet of Things, etc. Such compatibility with these technologies will help build future-centric mobile applications.
Also, the cross-platform compatibility of React Native will be seen as more robust with future updates. We might see enhanced efficiency, productivity, and third-party integrations across different platforms in the upcoming React Native versions.
Also, the team will focus more on performance optimization area. We might see React Native apps with high performance and speed to narrow the gap between native and cross-platform apps.
React Native and Other Frameworks
|
Particulars |
React Native |
Flutter |
Xamarin |
|
Initial Release Date |
2015 |
2017 |
2011 |
|
Programming Language |
JavaScript |
Flutter Dart |
C# with Dot.Net |
|
Architecture |
React Native Flux |
Flutter Skia C++ Engine |
Xamarin Mono execution environment |
|
GUI |
UI Controllers |
Proprietary Widgets |
Native UI Controllers |
|
IDEs |
Atom Nuclide Visual Studio Code |
Android Studio IntelliJ IDEA Visual Studio Code |
Visual Studio XCode |
|
Tools |
Expo Redux Ignite Flow Reduxsauce ESLint React Navigation |
Flutter SDK DevTools Hot Reload |
NuGet Xamarin Inspector Prism MFractor Resharper |
|
Community Support |
Excellent |
Good |
Very Limited |
|
Popularity |
Rapidly Growing (62.5% users) |
Rapidly Growing (75.4%) |
Good or Average |
Community and Ongoing Support
React Native developers across the globe contribute massively to improving the community support for fellow developers. Massive resources are available like video tutorials, documentation, community forums, etc. In case of any issues or troubleshooting, React Native developers can find instant help from the community.
Why Choose Expert App Devs as React Native Development Company?
If you think of Flutter or React Native app development, Expert App Devs is your most preferred choice. They offer a dedicated hiring model that costs less and is very convenient for your needs.
We have a team of experienced React Native developers who will leave no stone unturned to offer you the best outcomes. You can hire React Native developers from India monthly ($2500) or hourly ($22) per your project requirements in United States (US), United Kingdom (GB), Canada (CA), Australia (AU), Germany (DE), Kuwait (KW), New Zealand (NZ), Qatar(QA), South Africa (SA), Singapore (SG), United Arab Emirates (AE), and other countries.
Not just that, we also offer some value-added offerings, such as
- A shared project manager will be assigned to your project for smooth communication and project reporting.
- Also, we will sign an NDA before the project starts to ensure data confidentiality and security.
- You can opt for a 1-week risk-free trial to ensure that you are comfortable with the team you have selected.
With a dedicated hiring model, you can get the best ROI as you don’t have to spend on overhead costs, like software tool licenses, infrastructure, etc. All you need to pay for is the salaries of the developers you have hired.
We have a team of pre-vetted React Native developers who stay updated with the latest development tools and methodologies to offer the best cross-platform mobile apps that align with your business goals and expectations.
Conclusion
We have almost covered it all. React Native is one of the fastest-growing cross-platform app development frameworks with unparalleled potential and possibilities. Its highly beneficial features and functionalities help developers to build native-like mobile apps that are great in performance and speed.
Also, by integrating various emerging technologies like AI, AR, VR, IoT, and ML, you can develop smart mobile apps that offer an exceptional user experience to your audience.
By partnering with Expert App Devs, the best React Native app development company in India, you can have the best developers in your team with a proven track record and experience. They can build future-ready, superior, and user-centric mobile apps that can help get a competitive edge.
Look no further and call our representative now to discuss a collaboration opportunity.
 Jignen Pandya
